
Contents
Dynamic DNS Configuration
If you have a Netgear ReadyNAS storage device, you may consider installing the “DDclient” app (created by Poussin) to help update your Dynamic DNS service with your current, public IP. Traditionally, routers used to provide that service at no extra charge, including Asus and D-Link, but some companies have either abandoned it or started charging a monthly service fee (looking at you there, Amazon’s Eero!)
What is Dynamic DNS?
Without going into much detail, Dynamic DNS (DDNS) is a service that, among other features, allows you to update a specific address (ie. myhost.no-ip.com or myhost.dyndns.com) with your current, public IP address. (Apologies for this technical explanation, but going over what DNS is would require an article of its own.)
Public IP Address
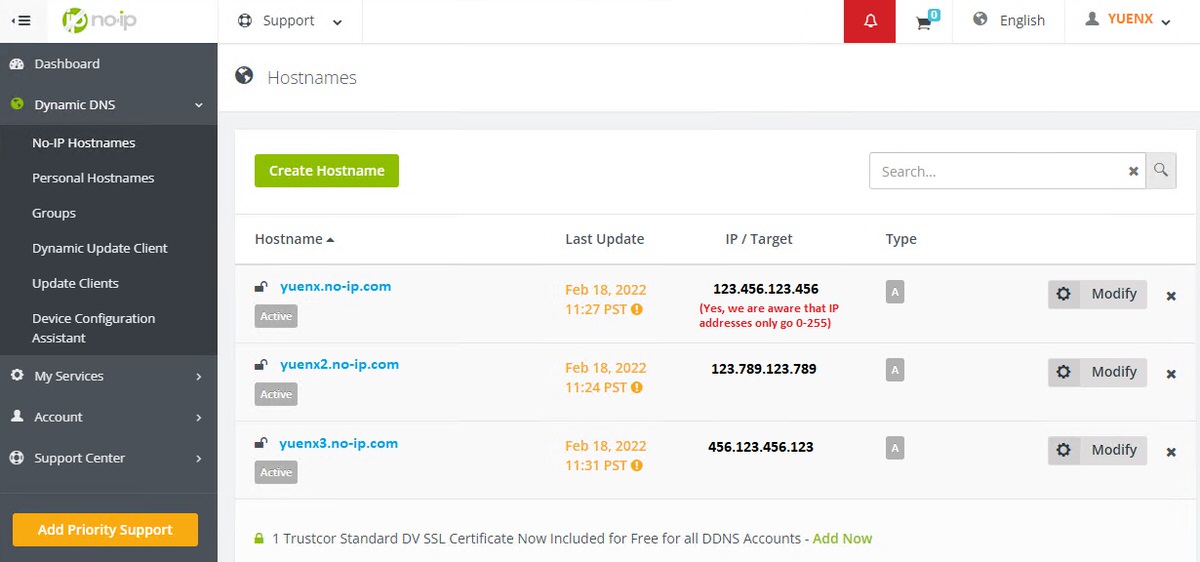
What could you do with such a service? Chances are, your home internet connection has its public-facing IP address change from time to time, as having a “permanent” one — a static IP — would be costly to buy from your internet service provider (ISP). DDNS allows you to choose an assigned hostname (like yuenx.no-ip.com) from a DDNS provider where its associated IP address is dynamically updated whenever your public IP changes. This essentially gives you a “static” address without paying the high fees charged by the ISP.
Having a “static” address allows you to remotely connect to your ReadyNAS or server from anywhere on the Internet using a single address (like yuenx.no-ip.com) even if your home IP changed. This is done in conjunction with running a DDNS client from your home router, server, or ReadyNAS. It periodically checks if your public IP changed, and if so, it would connect to the DDNS provider and update the hostname with the new IP. For example…
- Without DDNS
- You remotely access your ReadyNAS by the IP assigned to you today: https://123.1.1.100.
- Tomorrow, your ISP changes your Public IP to 123.1.1.200. If you attempt to connect to your ReadyNAS at https://123.1.1.100, it would no longer work since your IP has changed to https://123.1.1.200. To find out what your NEW, public IP is, you would have to either go home or find other ways to do so.
- Once you find out what your NEW IP is, you now access your ReadyNAS at the new IP of https://123.1.1.200.
- With DDNS
- You signed up for the hostname of yuenx.no-ip.com with a Dynamic DNS provider and associated it with today’s IP of 123.1.1.100. You access your ReadyNAS by going to https://yuenx.no-ip.com.
- Tomorrow, your ISP changes your Public IP to 123.1.1.200. The DDNS client detects that change and updates yuenx.no-ip.com to now point to 123.1.1.200.
- You continue accessing your ReadyNAS by going to https://yuenx.no-ip.com without having to know that your NEW IP actually changed to 123.1.1.200.
Configuration Steps
Let’s go over how to configure your ReadyNAS with the DDclient to dynamically update your DDNS name with your new, public IP.
WARNING: Proceed at your OWN RISK! The steps outlined here could potentially BREAK your ReadyNAS and put it out of warranty! This article only details what I did to get the DDclient app to work on my own ReadyNAS. Your results may vary. If you are unsure of what needs to be done, stop here and contact Netgear support.
Obtain a DDNS Account
Various Dynamic DNS services are supported by the DDclient, such as No-IP and DynDNS. Other services can also be found in the DDclient sample configuration file. Sign up for a (generally) free account.
Install “DDclient”
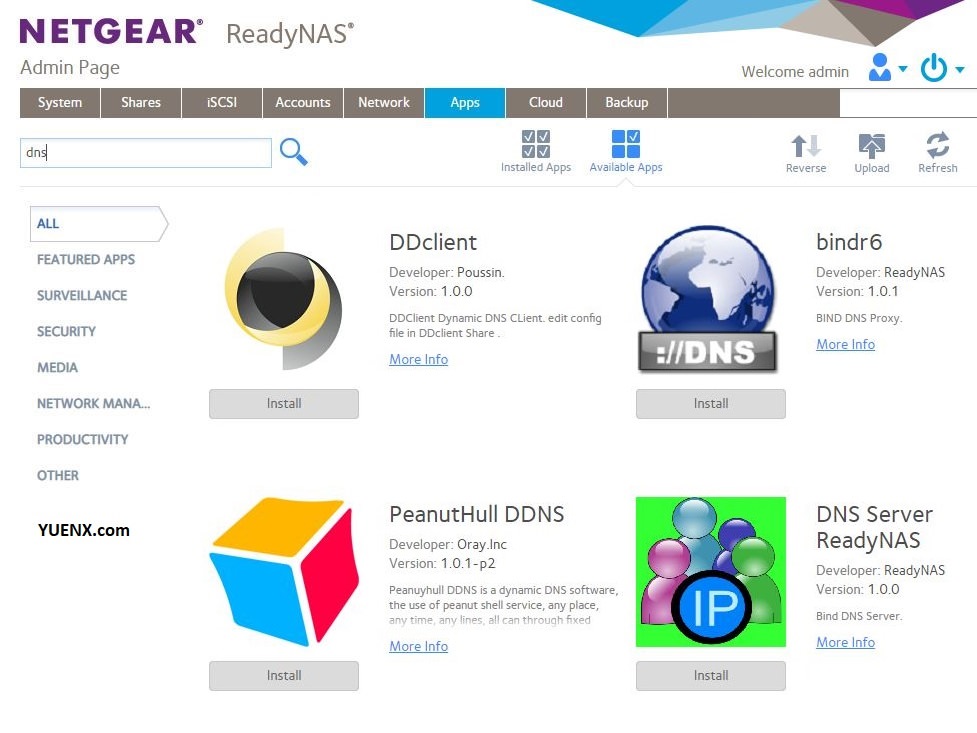
From the ReadyNAS web interface, go to the Apps tab > Available Apps > and search for “DDclient”. Install it. A new “DDclient” share will be created on the NAS.
Netgear unofficially exited the storage business in the summer of 2022, and as such, apps can no longer be installed from the ReadyNAS admin web console. However, you can still manually find them on the ReadyNAS Apps site.
Enable SSH
SSH is needed for the next steps. Please be advised that enabling SSH can expose your ReadyNAS to remote attack risks from threat actors, including having code installed that could compromise your device and/or allow bad people to perform nefarious acts. Furthermore, if you are not familiar with Linux, you may potentially also wreak havoc to your device. Netgear specifically warns that enabling SSH could void your warranty. Proceed at your own risk! Once you are done with your configuration, I strongly suggest for you to disable SSH access right away.
Warning: Be advised that enabling SSH can expose your ReadyNAS to remote attack risks from threat actors, including having code installed that could compromise your device and/or allow bad people to perform nefarious acts. It may also void your warranty.
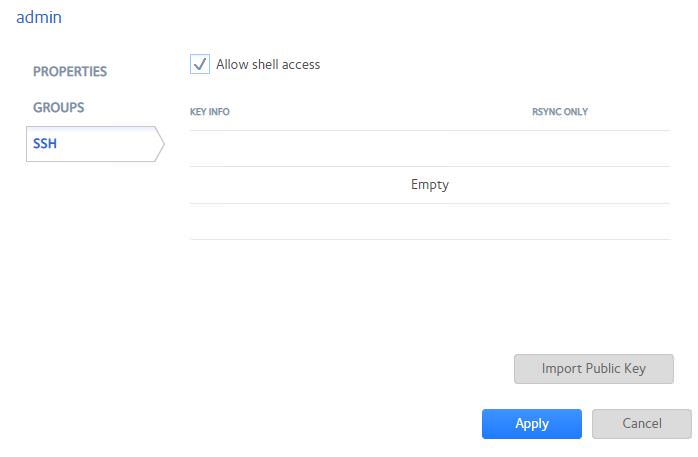
From the ReadyNAS web interface, go to the Accounts tab > Users > admin (user) > Settings. From the “SSH” tab, check “Allow shell access”. You may be asked to provide your “Current password”.
SSH into ReadyNAS
Connect to the ReadyNAS using a SSH client, such as the free puTTY. Log in as “root” using the same password as the “admin” user. If you do not log in as “root”, but with another admin account instead (such as “admin”), trying to start the DDclient service results in an odd error:
[....] Starting ddclient (via systemctl): ddclient.serviceFailed to start ddclient.service: The name org.freedesktop.PolicyKit1 was not provided by any .service files
See system logs and 'systemctl status ddclient.service' for details.
failed!
The error was due to being logged on with an account that did not have root privileges. Since “sudo” is not available on the ReadyNAS by default, logging on as “root” would satisfy the access requirement.
Configure ddclient.conf
The instructions for the DDclient app state: “Edit config file in DDclient Share”. A “ddclient.conf” file must be created under the /data/ddclient share in a Linux file format. Creating the file from scratch on Windows with Notepad++ introduces LF/CRLF issues (details are out of scope of this article.) As such, it is best that you create the file from within the SSH session itself using a command-line editor such as “vi”.
With that said, I discovered that creating /data/ddclient/ddclient.conf actually would not work, as I later found during troubleshooting with the “systemctl status ddclient.service” command:
Feb 18 15:41:41 READYNAS_HOST systemd[1]: Starting LSB: Update dynamic domain name service entries...
Feb 18 15:41:41 READYNAS_HOST ddclient[13244]: WARNING: file /etc/ddclient.conf, line 9: Invalid Value for keyword 'login' = ''
Feb 18 15:41:41 READYNAS_HOST systemd[1]: Started LSB: Update dynamic domain name service entries.
The DDClient was actually trying to use /etc/ddclient.conf! (Thank you for pointing that out in your post, “redstamp”.) I went ahead and deleted /data/ddclient/ddclient.conf and edited the right file in /etc:
vi /etc/ddclient.conf
Below are the configurations for both DynDNS and No-IP:
# /etc/ddclient.conf
# Author: https://www.yuenx.com/2022/netgear-readynas-ddclient-configuration-for-dynamic-dns-dyndns-no-ip
# Reference: https://help.dyn.com/ddclient
# Reference: https://sourceforge.net/p/ddclient/git/ci/60fe051b7a504573386e2df2ffa8703dd47a8cb9/tree/sample-etc_ddclient.conf
# Reference: https://www.bleddynrichards.co.uk/posts/installing-ddns-provider-on-readynas
#
# CONFIGURATION FOR DYNDNS.COM
#
daemon=600
# You SHOULD use SSL to securely send your credentials over to DYNDNS to log in with!
ssl=yes
mail=my_readynas_user_with_email_address
# mail all msgs to my_readynas_user_with_email_address
mail-failure=my_readynas_user_with_email_address
# mail failed update msgs to my_readynas_user_with_email_address
use=web, web=checkip.dyndns.com, web-skip='IP Address'
protocol=dyndns2
server=members.dyndns.org,
login=my_ddns_username
password=my_ddns_password
my_host.ddns.com,
# /etc/ddclient.conf
# Author: https://www.yuenx.com/2022/netgear-readynas-ddclient-configuration-for-dynamic-dns-dyndns-no-ip
# Reference: https://help.dyn.com/ddclient
# Reference: https://sourceforge.net/p/ddclient/git/ci/60fe051b7a504573386e2df2ffa8703dd47a8cb9/tree/sample-etc_ddclient.conf
# Reference: https://www.bleddynrichards.co.uk/posts/installing-ddns-provider-on-readynas
#
# CONFIGURATION FOR NO-IP.COM
#
daemon=600
# You SHOULD use SSL to securely send your credentials over to NO-IP to log in with!
ssl=yes
mail=my_readynas_user_with_email_address
# mail all msgs to my_readynas_user_with_email_address
mail-failure=my_readynas_user_with_email_address
# mail failed update msgs to my_readynas_user_with_email_address
use=web, web=ip1.dynupdate.no-ip.com, web-skip='IP Address'
protocol=noip
server=dynupdate.no-ip.com,
login=my_ddns_username
password=my_ddns_password
my_host.ddns.com,
Configuration Notes
- Lines 12, 14: Replace “my_readynas_user_with_email_address” with the ReadyNAS user you want emails to be sent to. Example: mail=yuenx. Remove or comment out the “mail” and “mail-failure” lines if you do not want notifications.
- Lines 19-20: Replace “my_ddns_username” and “my_ddns_password” with your DDNS service’s login credentials
- Line 21: Replace “my_host.ddns.com” with the DDNS address given to you, such as yuenx.no-ip.com or yuenx.dyndns.info
- If you use other DDNS services, look at the sample configurations on SourceForge and modify lines 16-18 accordingly
Test Configuration & SSL Error
Once you have the /etc/ddclient.conf file created, test start the ddclient service and look for any error messages. You may do so with:
/etc/init.d/ddclient start -daemon=0 -debug -verbose -noquiet
To stop, use:
/etc/init.d/ddclient stop -daemon=0 -debug -verbose -noquiet
Look for any errors with:
systemctl status ddclient.service
Output would look similar to:
ddclient.service - LSB: Update dynamic domain name service entries
   Loaded: loaded (/etc/init.d/ddclient; generated; vendor preset: enabled)
   Active: active (running) since Fri 2022-02-18 15:41:41 PST; 32min ago
     Docs: man:systemd-sysv-generator(8)
  Process: 12088 ExecStop=/etc/init.d/ddclient stop (code=exited, status=0/SUCCESS)
  Process: 13244 ExecStart=/etc/init.d/ddclient start (code=exited, status=0/SUCCESS)
   CGroup: /system.slice/ddclient.service
           └─13253 ddclient - sleeping for 70 second

Feb 18 15:41:41 READYNAS_HOST systemd[1]: Starting LSB: Update dynamic domain name service entries...
Feb 18 15:41:41 READYNAS_HOST ddclient[13244]: WARNING: file /etc/ddclient.conf, line 9: Invalid Value for keyword 'login' = ''
Feb 18 15:41:41 READYNAS_HOST systemd[1]: Started LSB: Update dynamic domain name service entries.
In the above example, line 11 shows a warning that file “/etc/ddclient.conf” had an invalid login value. That was when I realized that “/data/ddclient/ddclient.conf” was not the right file to create as per the original app creator’s instructions.
- Take note of the timestamps of the last 3 lines in relation to your current time: there may NOT have been an error on the last execution. Rather, the lines may just be outdated messages from the previous, failed attempt.
- Line 8, “sleeping for 70 second”, shows when the service will try to log in to the DDNS service again.
The below output is what it SHOULD look like if everything was configured correctly. Note that the last 3 lines shown in the previous example are now gone:
ddclient.service - LSB: Update dynamic domain name service entries
   Loaded: loaded (/etc/init.d/ddclient; generated; vendor preset: enabled)
   Active: active (running) since Fri 2022-02-18 18:39:11 PST; 3min ago
     Docs: man:systemd-sysv-generator(8)
  Process: 12088 ExecStop=/etc/init.d/ddclient stop (code=exited, status=0/SUCCESS)
  Process: 13244 ExecStart=/etc/init.d/ddclient start (code=exited, status=0/SUCCESS)
   CGroup: /system.slice/ddclient.service
           └─13253 ddclient - sleeping for 120 second
If your DDNS IP still did not update after correctly configuring the /etc/ddclient.conf file, check the mailbox for the user you had configured to receive mail/mail-failure messages. In my case, I was notified about exactly what I had to do next:
SUBJECT: status report from ddclient@YuenX-NAS
FATAL:    Error loading the Perl module IO::Socket::SSL needed for SSL connect.
FATAL:     On Debian, the package libio-socket-ssl-perl must be installed.
FATAL:     On Red Hat, the package perl-IO-Socket-SSL must be installed.
regards,
   ddclient@YuenX-NAS (version 3.8.2)
Notice line 2 stating that a “SSL” package was not installed in order to use a SSL connection to the DDNS service.
Install SSL Package
My ReadyNAS OS6 did not have the libio-socket-ssl-perl package installed. I did so by executing the following commands from the SSH session as the “root” user:
apt-get update -y
apt-get install -y libio-socket-ssl-perl
Once the SSL package was installed, I went through the “Test Configuration” steps (as described above) again. I later confirmed that no further errors were shown with the systemctl status ddclient.service command nor in the mailbox for which mail/mail-failure messages would have been sent.
Start DDclient App
With no further error messages found in the SSH session, I went back to the ReadyNAS web interface > Apps tab > DDclient, and switched it from Off to On.
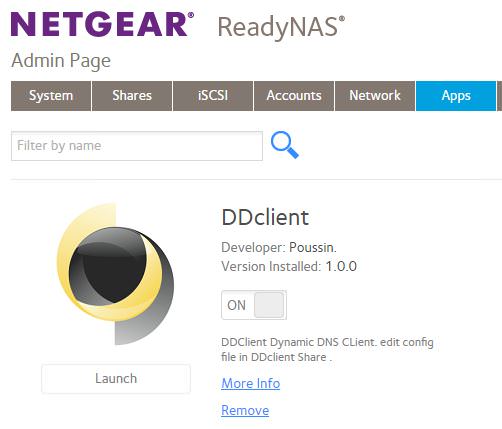
DDclient App by Poussin
Upon activating the DDclient app, I received an email:
SUBJECT: status report from ddclient@YuenX-NAS
SUCCESS:  updating yuenx.ddns.com: good: IP address set to 123.234.123.234
regards,
   ddclient@YuenX-NAS (version 3.8.2)
Success! Line 2 confirmed that the DDNS service updated “good” and the associated IP was set to my then-current, public IP address.
Verify DDNS IP Updated
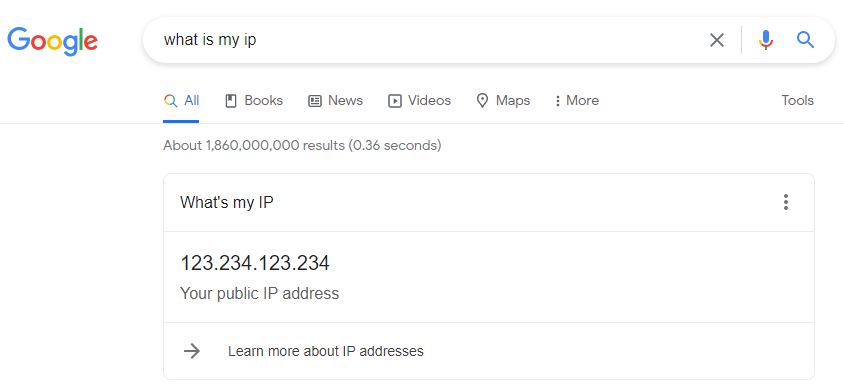
Go to your DDNS service and verify that the IP has updated to your current, public address. To find your public IP, go to WhatIsMyIP.com or simply type “What is my IP” on your favorite search engine.

Cleaning Up
IMPORTANT: For security reasons, I strongly urge you to disable SSH access once you are done.
From the ReadyNAS web interface, go to the Accounts tab > Users > admin (user) > Settings. From the “SSH” tab, uncheck “Allow shell access”. You may be asked to provide your “Current password”. Disabling SSH access helps ensure that threat actors do not have an easy way to fully control your ReadyNAS and use it for bad things, like stealing or wiping your data, holding your files hostage for ransomware, intercepting your account credentials, or launching attacks against other places and putting blame on you.