Woom 2 Bicycle & Balance Bike
Pros
- Kid-friendly design
- Low center of gravity
- Overturn protection
- Green-colored handlebar brake
- High resale value
Cons
- Pricey
- Not easily found for purchase

Contents
Learn to Bike Without Training Wheels
Article updated with lessons learned from teaching more than two children.
Teaching children how to bike is perhaps one of the most rewarding (and possibly important) duties for parents to take on, a job relegated mostly to dads among my family’s circle of friends. Naturally, my wife had tasked me to teach our son the skill, a challenge I gladly accepted as I wanted to have the family go out on day trips and spend quality time together. Our son started peddling on a bike — without training wheels — four months after he turned 3 years old, and I credit my wife’s foresight to putting him on something I had never heard of before: a balance bike. This was then followed by a bike made by Austria-based Woom.
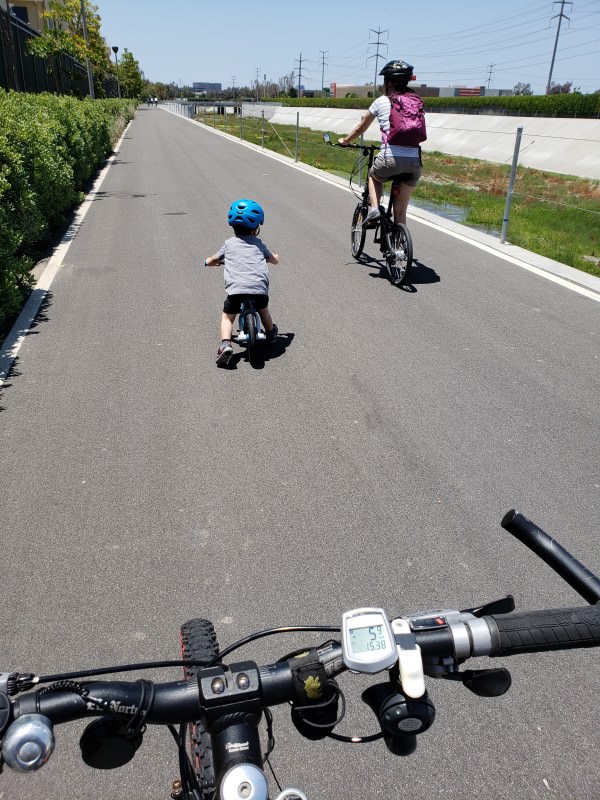
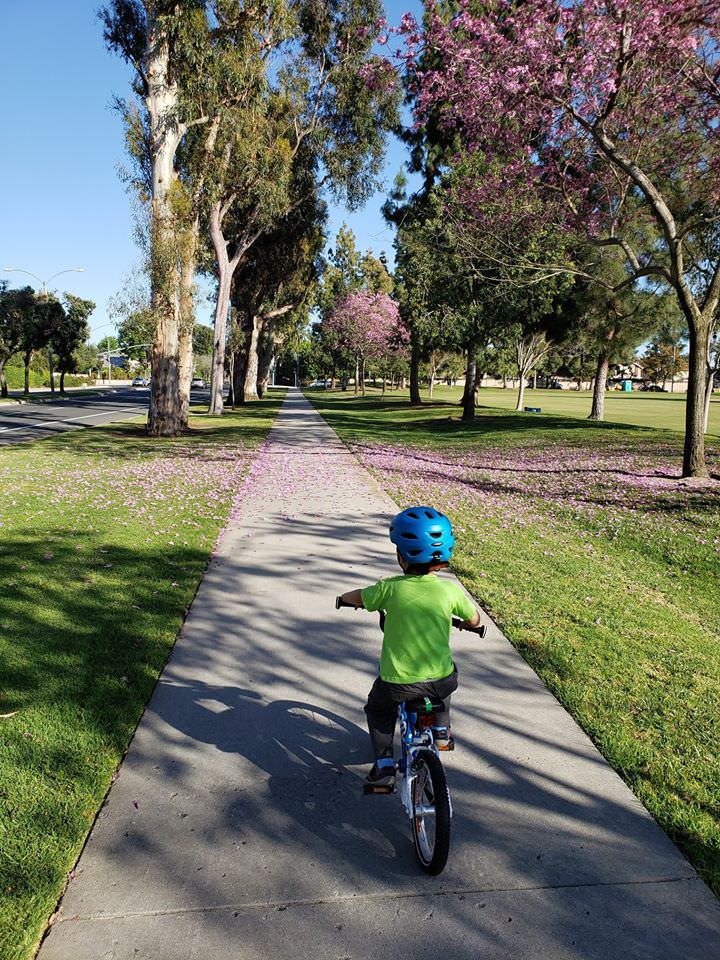
This post shares the journey our son went on in hopes to inspire other parents to take their children out biking. He went from someone who was very afraid of balance bikes to a boy whose smile is so big on two wheels, it melts my heart every time we go out pedaling together. In fact, I still very much cherish the moment I saw his reaction the first time he realized he could pedal unassisted: a face filled with excitement, eyes lit up, mouth wide opened, and sheer happiness and wonder exuding from every part of his soul. Pure joy! Watching him revel in his newfound freedom to circle around the neighborhood cul-de-sac, leisurely pedal down a bike path with his breeze-brushed, little face, or going on mini excursions with his parents — that is where love and adventures can grow.
Friends and family later followed our findings and soon found their children biking too.
Training Wheels
Why should you NOT use training or stabilizer wheels to teach a child (or adult) how to bike? They will not train the person how to balance. Balance is the first and most difficult requirement for learning to ride, and once achieved, pedaling could be picked up VERY quickly.
Balance is the first and most difficult requirement for learning to ride.
Balance Bike
One of the fundamental skills for biking is balance. How do you go about in teaching a toddler that? Through a balance bike. It looks just like any other bike, except for one difference: it has no pedals. This allows the toddler to use his own feet to propel himself forward (or backward) until he has gained the confidence — and balance — to lift his feet off the ground. Mind you, there are some people who have balance issues due to medical reasons, so please check with your doctor as needed. Braking was done by dragging his shoes on the ground, and so you may not want him to wear a set of expensive footwear. We found Crocs Clog effective as they could take quite a beating.
A balance bike has no pedals.
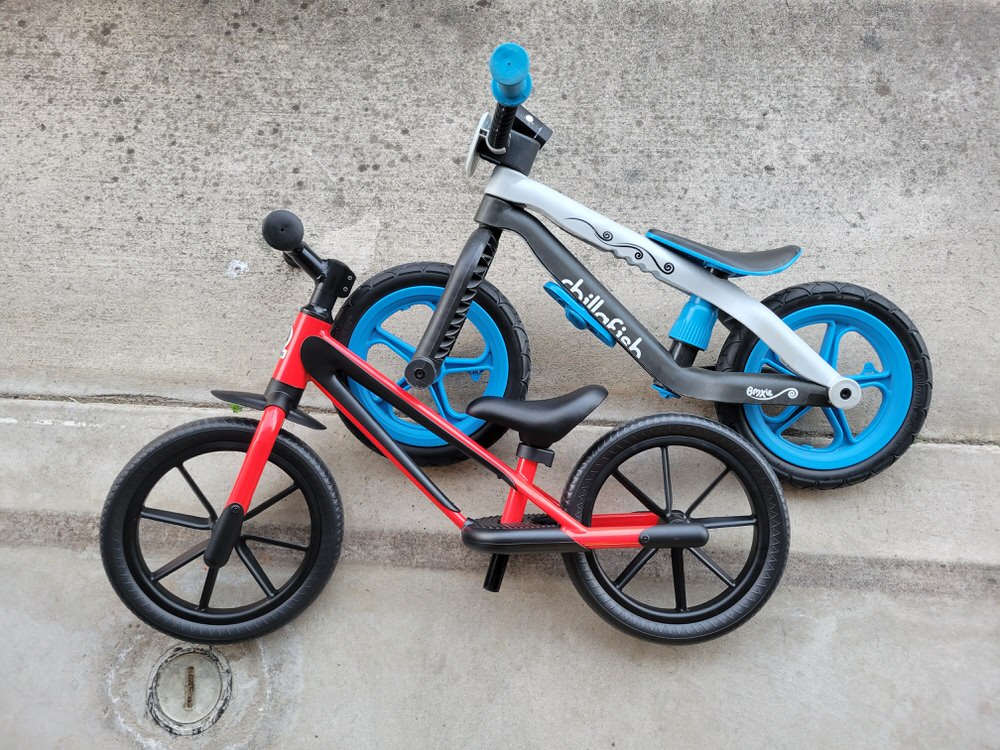
We were fortunate to have been gifted a Chillafish BMXie-RS Balance Bike by our son’s Godmother for his second birthday. It was not until he was 2 years and 4 months old when we introduced it into his life. He was excited at first, but he had difficulty walking around the house with it between his legs and interest quickly waned. We kept at it, however, by encouraging him to go on the balance bike in order to get to the playground, and eventually he obliged. He also refused to wear a helmet. Our first daughter was the same way. Read on to see how we addressed those challenges.
Update 9/17/2021: I recently came across a new product that caught my attention — Joycruise 3-in-1 Tricylce. What impressed me is that it can be used as a tricycle and also a balance bike by moving the rear wheels together. Neat concept!
Seat Height and Helmet
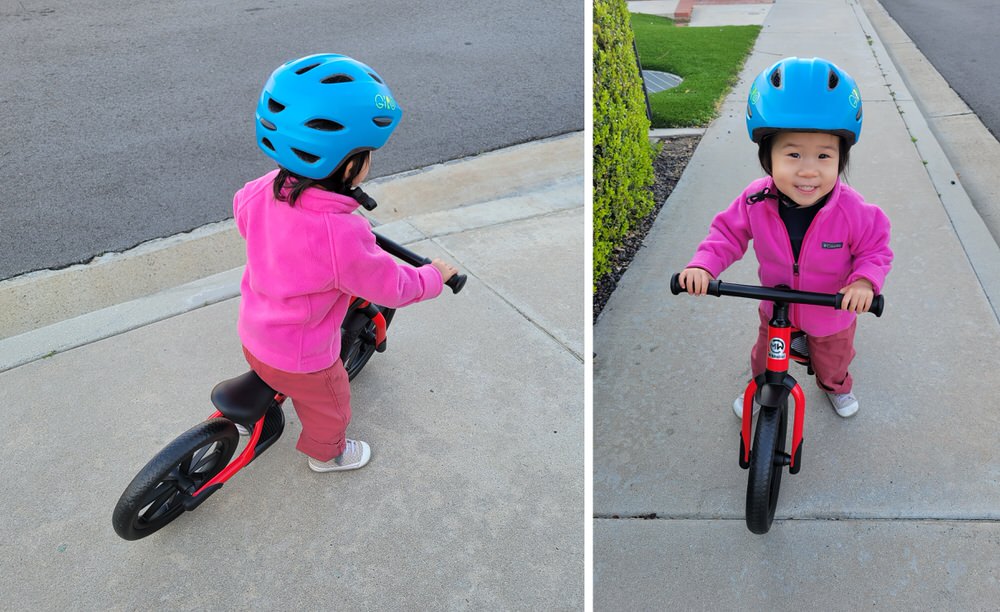
The key to getting our son used to the Balance bike, as I had discovered, was to initially lower the seat enough for his feet to become parallel with the ground and the legs slightly bent at about a 160 degree angle — like walking with a broom between the legs. Our goal was to get him to LIKE the bike first before we would increase the difficulty by introducing balance training. During that time, I helped him learn how to steer the handlebar into the direction of travel while pushing him around seated. I also made sure the seat was always pointed straight ahead and as centered with the handlebar as possible — any slight deviation could throw off his sense of balance.

Our first daughter followed a similar pattern at 2.5 years old: we got her to LIKE the balance bike first by having both feet parallel to the ground, and as she moved around faster, I raised her seat up enough to be slightly tip-toed to encourage balancing and faster movement.
Let’s first talk about Helmet (safety) before diving more into proper Seat Height.
Helmet
As he grew a liking to the bike, we introduced the helmet and encouraged him to be seated while walking. He flat out refused to wear one, but he loved walking to the playground to play. “Do you want to go to the playground?” “Yes,” was his reply. “If you want to go, you have to wear the helmet.” That did the trick! Nearly every single day, he walked the bike between his legs to the playground while donning his shiny, new head wear. No helmet, no playground. He eventually asked for it automatically whenever he went biking. [On that note, he had a hard, head-first fall into concrete with the helmet on when he was 3.5 years old. I reminded him that the pain would have been greater had he not worn one.]
Simple rule: No helmet, no playground.

Seat Height
Our son’s handling of the bike grew more confident by the day and that was the time to make him less comfortable. I raised his seat slightly until his heels were angled 35-45 degrees off the ground while seated (bike standing straight up). My thought was to now introduce balance training into his regimen and to also enable him to “fly” down the street (by letting his feet dangle on the bike’s sides as needed.) This process of raising the seat was repeated to ensure he would always stay slightly challenged. Comfort can slow down progress.
Eventually, once a rider is able to confidently pedal, the proper, seated height is when one of the pedals is placed at the lowest position, and leg bent at about 150 degrees with foot on the pedal. This should result in one of the feet resting on the ground at a 35-45 degree angle when stopped.
Proper, seated height is when leg is bent at about 150 degrees with foot on the lowest-positioned pedal.
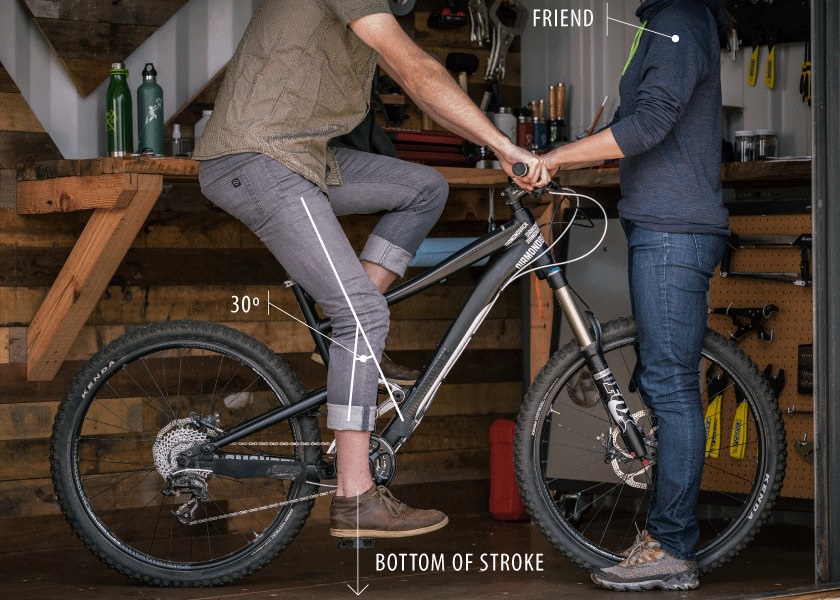
Proper seat height with pedal /REI
What to Look for in a Balance Bike
We wanted our son’s same-aged cousin to join in on the biking fun, and so we gifted him a Strider 12 Sport for his birthday. There were noticeable differences between his and our son’s Chillafish, and here is what I would recommend someone to look for when making a purchasing decision.
- Weight – Lighter is better. A heavy bike is more likely to pull the child down to the ground at the slightest imbalance
- Quality – There should be no questionable parts, particularly any rough, metal pieces that could cause an injury
- Overturn protection
- The Strider allows the handlebar to be turned 360 degrees. This could result in the child overturning, lose confidence, and fly straight to the ground
- The Chillafish can only turn roughly 270 degrees. I prefer this
- Rubber Tires – Rubber provides better grip for the road. I recommend those that are puncture/burst proof and do not run flat/require air to be pumped frequently
- Chillafish needs no air
- Seat Height Adjustment – Should be tool-less so the height and direction can be quickly adjusted
- Optional: Built-in Footrests – Allows the feet to stay off the ground while the bike zooms down the path. This can also create excitement for the rider
- Optional: Handlebar Pad – To protect the rider from having his chin hit the handlebar during a fall. You may make your own by using swimming pool noodles
Training wheels: The recommendation is to NOT use them at any point in time. By learning to balance without training wheels, the child can transition to regular bikes faster.
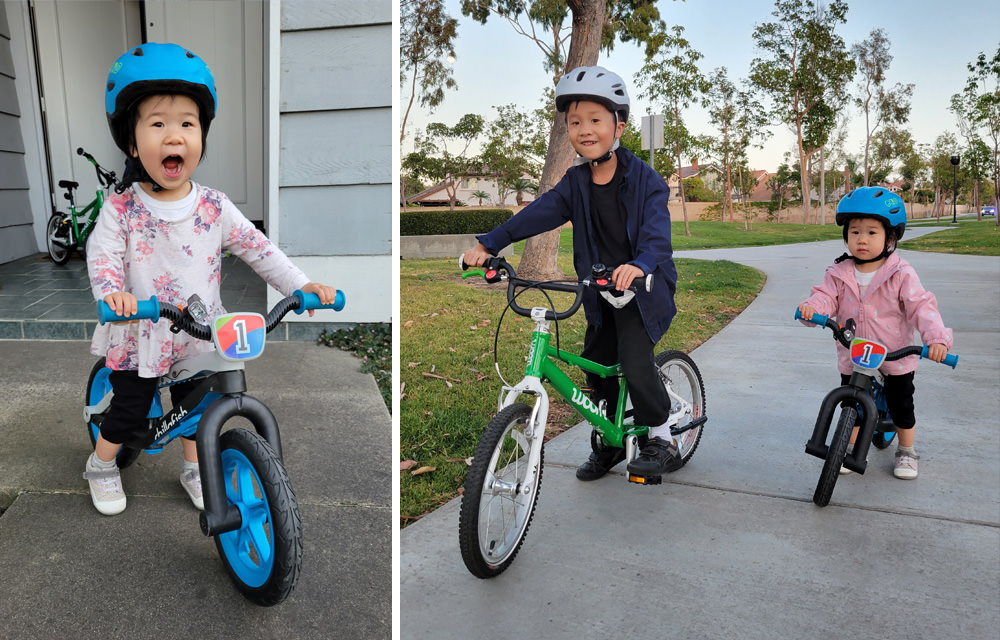
There are balance bikes that can grow with the child with options to add hand brakes and pedals. We opted to go with just the basic balance bikes and upgrade to a new bike as needed. The old balance bike would then be passed to the next child or someone else in need of training. This would allow our son to bike with his little sister later on.
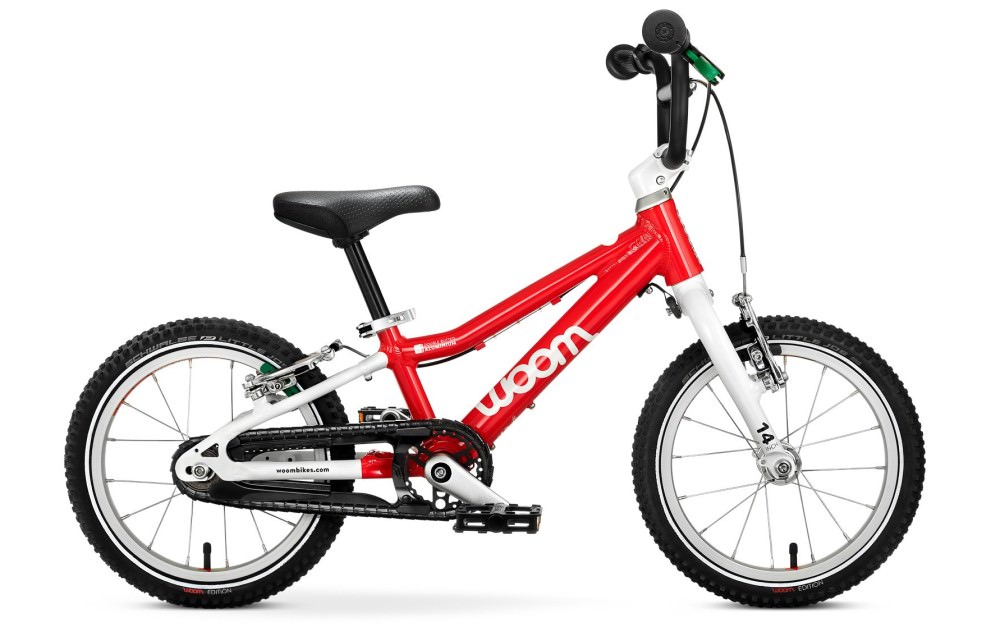
Woom 2 Pedal Bike
Woom 2 Peddle Bike /Woom
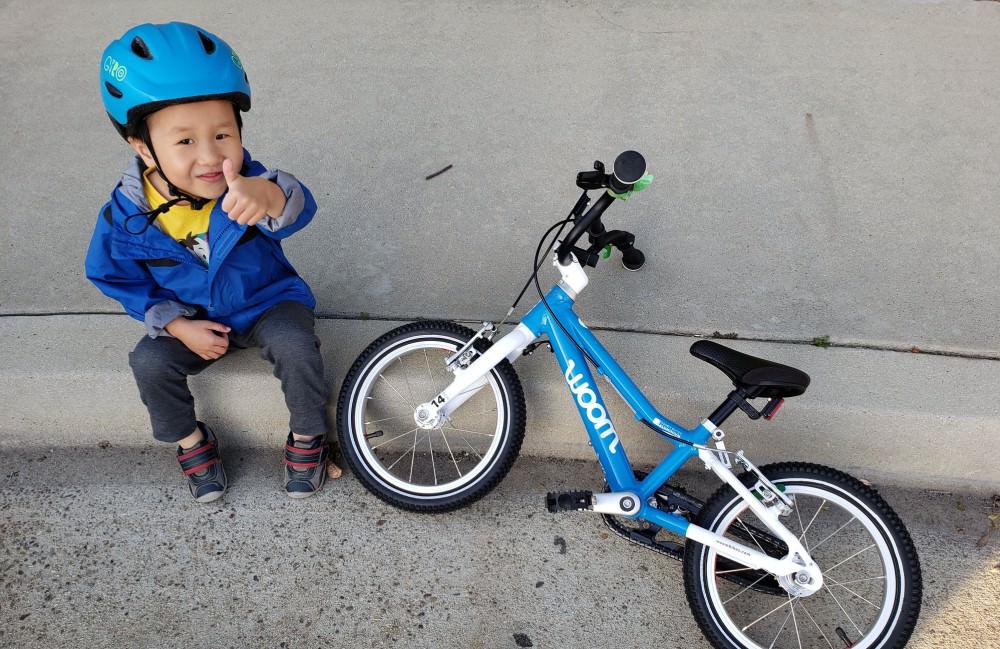
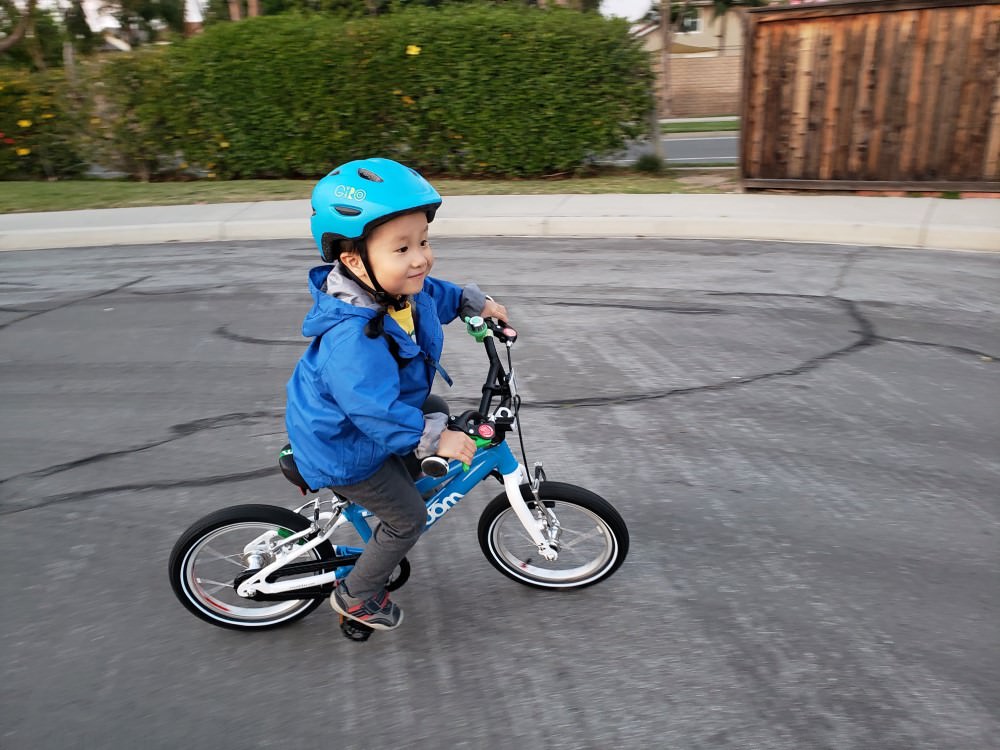
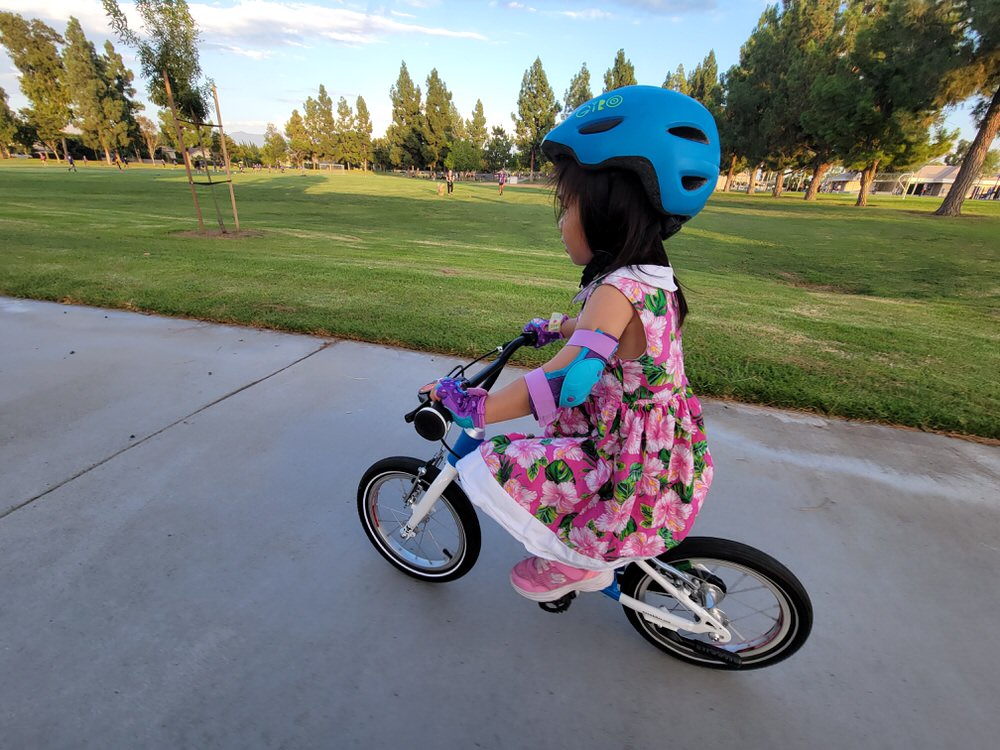
Our son grew extremely confident with his balance bike by the time he turned 2 years and 10 months old. Often, we would find him lift his feet off the ground while riding down a sloped path. That was when we knew it was time to upgrade to the Woom 2 Pedal Bike (14″, Ages 3 to 4.5 Years) and used as a balance bike with hand brakes first. It was designed in Austria and manufactured in Cambodia. That was QUITE a coincidence! I was born in one country and grew up in the other!
My wife had read a lot of good things about Woom, and after having seen it in action, the reputation was well-deserved. The company had become known as a maker of bicycles that focus on children’s needs with training-friendly designs and features, including a lower center of gravity and trade-in upgrade program as the child grows. In fact, after a friend saw that our 3-year-old son already learned to bike without training wheels on the SAME DAY of being introduced to pedals, he mentioned that his 4-year-old twins were still struggling. I pointed him towards the Woom and within an HOUR of receiving them, his children, too, started pedaling without any assistance!
The Woom bikes helped three children go from balance bikes to pedaling within just a SINGLE day.
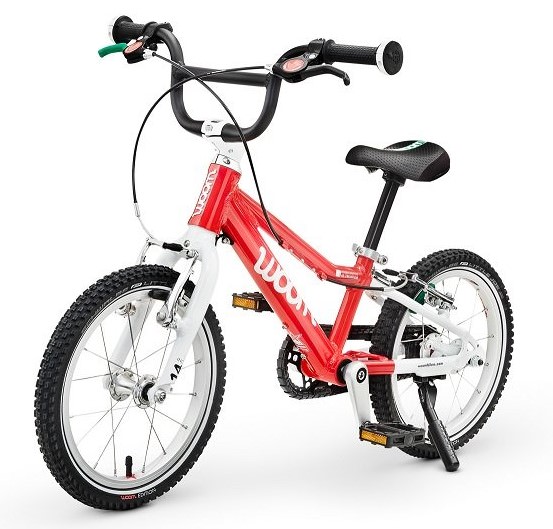
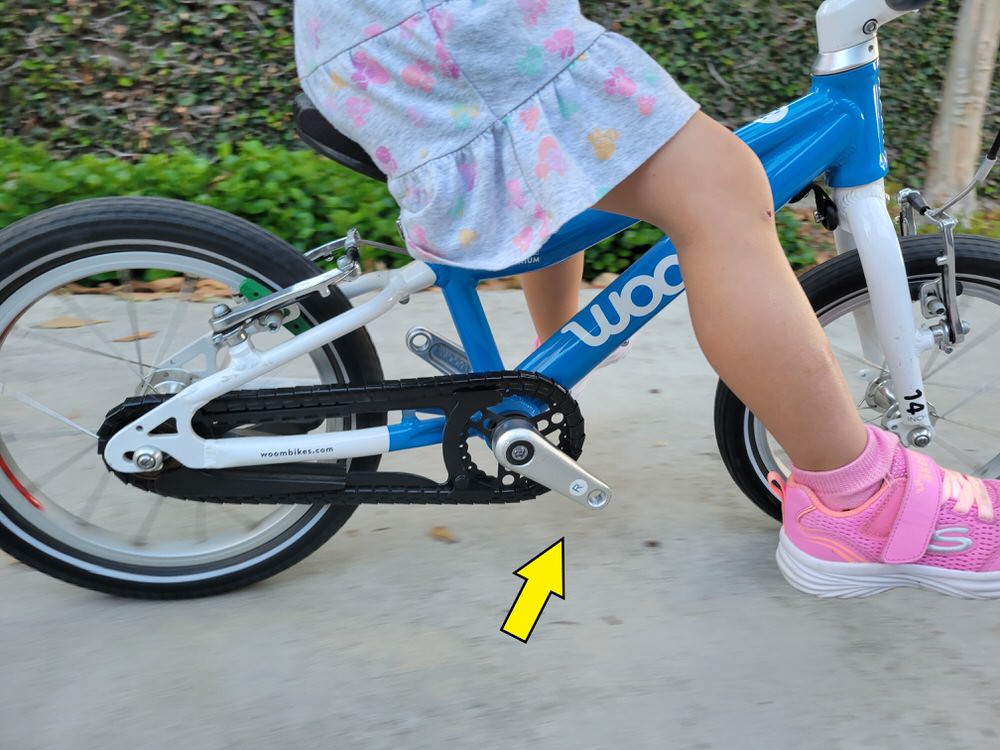
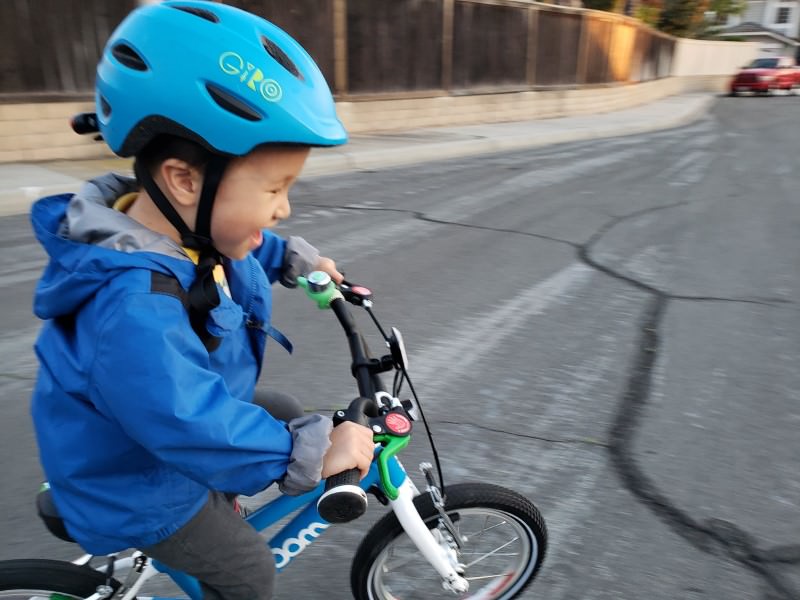
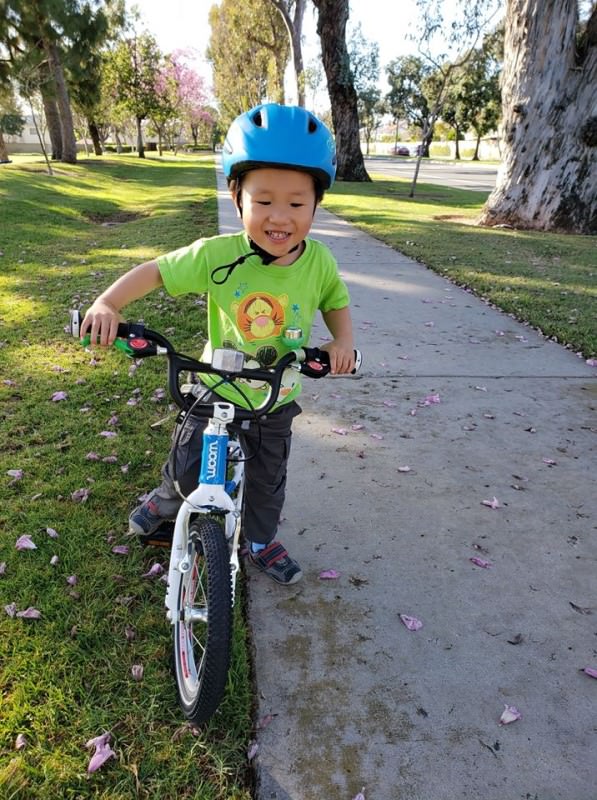
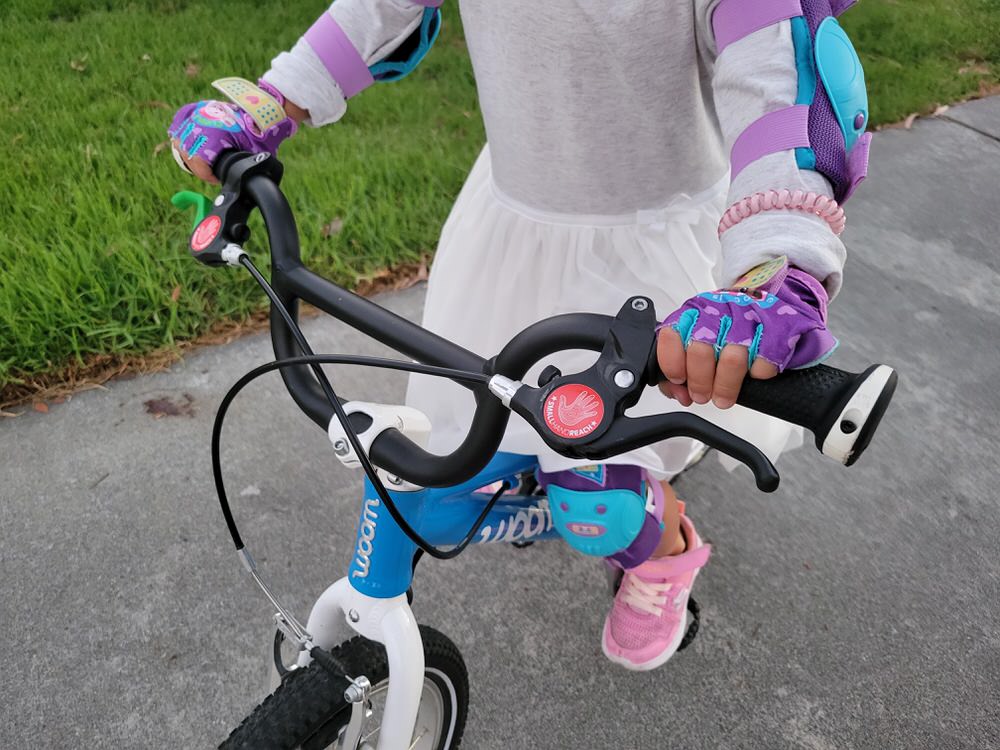
What immediately caught my attention about the Woom 2 were the hand brakes, its light weight, and the ability to first use the Woom as a balance bike by removing the pedals. This allowed him to continue cruising along as a balance bike while transitioning to hand brakes — not dragging his shoes on the ground — to slow down. The right-side brake, which controls the rear wheels, is colored green to help him remember to use it over the front wheel brake for a safer, more controlled stop.
Hand vs Foot (Coaster) Brakes
In the US, the Woom is shipped with front and rear brakes, levers, and a “coaster (foot) brake” that the rider activates by putting pressure on the pedals in the reverse direction. Foot brakes are a requirement set by the CPSC (Consumer Product Safety Commission) for children’s bikes of a certain height. I grew up in Europe as a child and can empathically say that even though drifting around with coaster brakes was fun, hand brakes are much safer. Woom agrees and explains in detail why on its blog. For that reason, the company makes a $20 freewheel kit available that my wife and I strongly encourage you to get. You can have it installed by your local bike shop or by yourself after watching Bike Shop Girl‘s YouTube video below:
I did introduce coaster (foot) brakes to my son a year after he learned how to pedal with hand brakes just so that he would be familiar with another way of slowing down. It only took him a few minutes to get the hang of that.
Let’s Learn to Pedal!
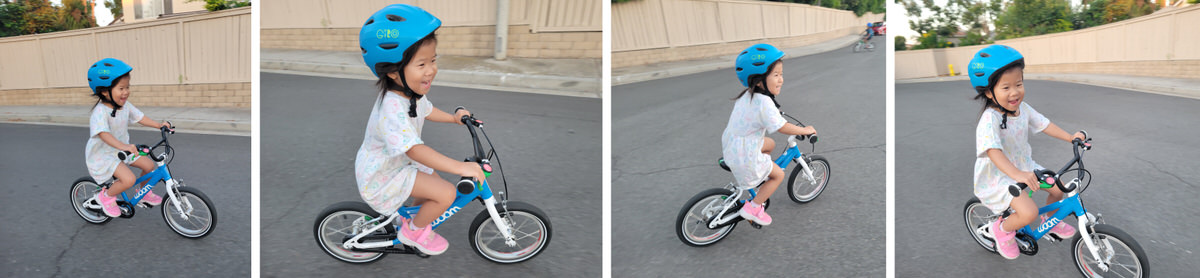
Six months had passed since our son transitioned from the Chillafish to the Woom 2 as a balance bike, and had since learned how to operate the hand brakes. I saw him confidently raising both feet up at times while cruising around, and so it was time to put back on the two pedals to turn the Woom balance bike into a full-featured one. He was now 3 years and 4 months old. (Our first daughter was 3 years and 10 months when we did this, but we had also practiced far less often.) Here is how he (and later she) progressed from that point on.
Day 1
- He was introduced to the mechanics of pedaling while I held onto the bottom of the seat. This meant showing him how to push the pedal down to have the bike move forward
- Ensured the seat was raised to the proper height
- It was initially set a bit too low before I realized that it was the cause for his imbalance. That was the same situation for my 1st daughter years later
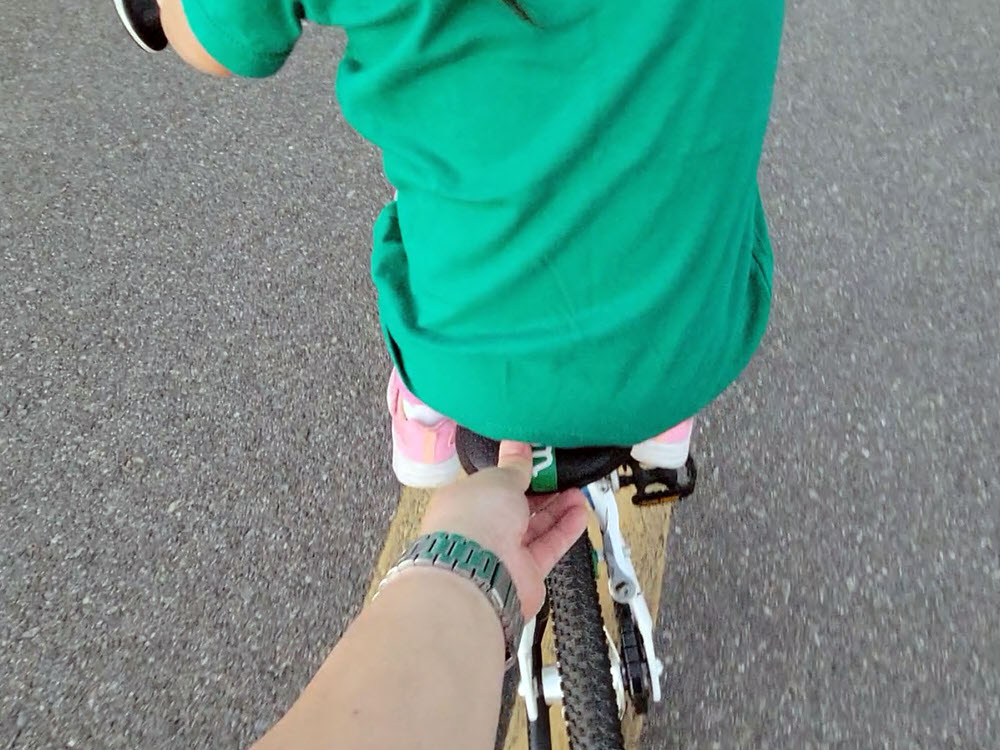
- I later held him up by the armpits, constantly reminding him to “pedal, pedal, pedal!”
- With my 1st daughter, holding by the armpits or handlebar created a reliance for her to keep leaning to one side and having to constantly pull her back into balance. I switched back to grabbing just the seat, and that rapidly accelerated her confidence to balance herself
- Ensured the seat was raised to the proper height

- Repeatedly, he shouted: “I’m scared! Hold on to me!” I kept re-assuring him that I was right behind and said, “Keep pedaling so you won’t fall!”
- We took many breaks in-between tries so he would not get too frustrated or scared to continue
- That was where encouraging talks came in. For our 1st daughter, I painted a picture of her biking to one of her favorite parks one day
- My 1st daughter was similar (though a bit more dramatic) and had to be given extra instructions to give her more confidence in her ability:
- How to keep the handlebar steady and to only move it slightly for turns
- How to slow down with the green-colored handlebar brake by gently squeezing and letting go once at desired speed — but not to the point where it was too slow and tipped her balance
- She wanted to have the pedals removed, but I told her that it was no longer an option and to think about her biking to the park one day instead
- We took many breaks in-between tries so he would not get too frustrated or scared to continue
Key Tips: Instructions on basic bike operation, proper seat height, plenty of encouragement and goal setting, breaks, patience, holding the rear seat (not arm pits or handlebar) to encourage balance, and repeating, “pedal, pedal, pedal!”
- Gradually, I started to let go of the seat for a few seconds at a time, and after about an hour, he was able to stay up for about five seconds. It was similar for the 1st daughter
- Then, he became discouraged and said, “I can’t.” You could see in his face that he was defeated
- We sat down along the sidewalk, and I said, “Let’s watch a video together and try one last time today.”
- The video was of him biking, and I suddenly saw yet another change in his face. He smiled wide and asked to be recorded some more. “Okay, let’s go!” I said
- Our 1st daughter was also encouraged at the sight of a video of herself (on her Day 2)
- Be mindful to keep any frustration you may have in check! My daughter once said, “Please don’t get mad.” It was a good reminder to be patient and encouraging
- Another way to encourage was through goal setting
- I told the 1st daughter to bike for “1 minute” (she would have no concept of how long a minute was anyway), then two, and so on, gradually increasing the time she would be on the bicycle
- We sat down along the sidewalk, and I said, “Let’s watch a video together and try one last time today.”
- He kept trying and trying, cheerfully reviewing a video of him at each break
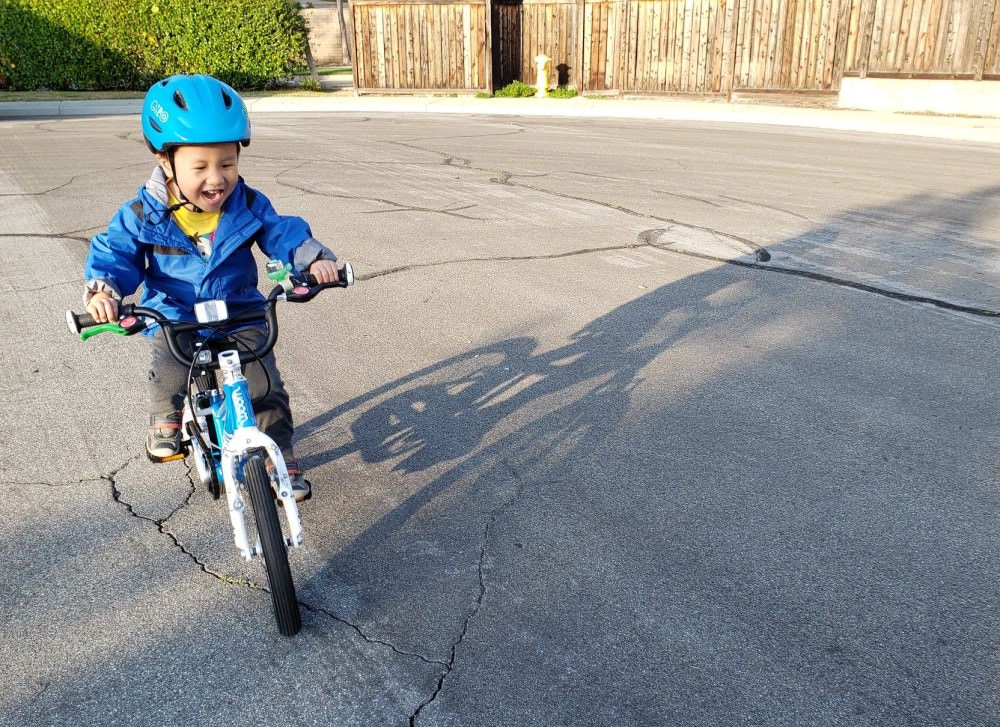
- After what must had been only ten minutes, he suddenly biked non-stop in a circle around me with full CONFIDENCE and JOY! HE DID IT!
- For comparison, our 1st daughter had only gained confidence to bike straight and without stabilization assistance at the end of Day 2
The moment our son (and later our 1st daughter) biked circles around me for the very first time, his reaction will forever be cherished: a face filled with excitement, eyes lit up, mouth wide open, and sheer happiness and wonder exuding from every part of his soul. Pure joy!
Days 2-3
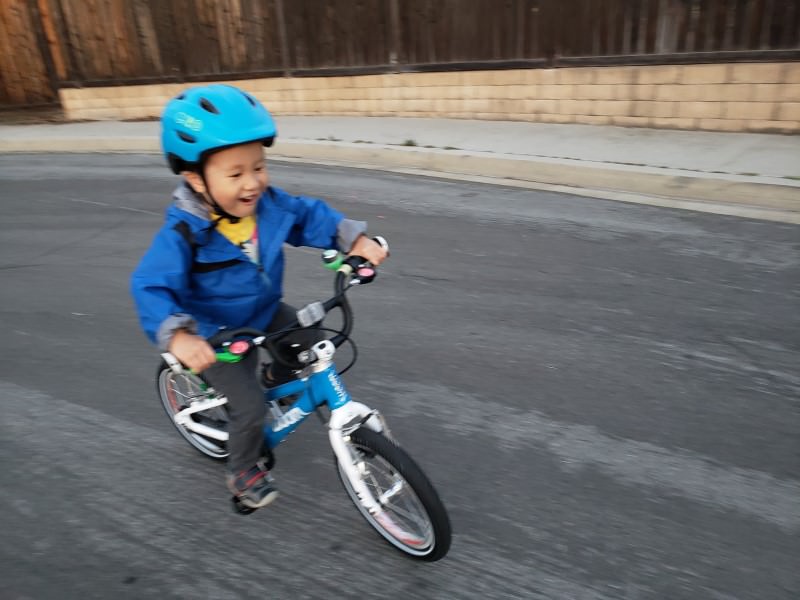
- His confidence and speed grew with each day. All I had to do was give him the initial push to get the bike moving, and remind him to pull on the GREEN lever (rear brake) to slow down
- Our 1st daughter was more of a challenge to teach as she lost confidence after a fall on the 2nd day
- Encouragement, bribery, and small goals (“ride for only 1 minute”) did not work, but we kept at it despite the high level of frustration we both had experienced: she would either not want to try at all or stop after just a handful of seconds
- Common issues she cited: wanting to be held (even though my hand was always behind her or on the seat), scared of falling, fear of going “too fast” (she forgot to pedal or did so at too slow of a pace to keep bike up), “I can’t do it”, or “I need a break”
- Encouragement, bribery, and small goals (“ride for only 1 minute”) did not work, but we kept at it despite the high level of frustration we both had experienced: she would either not want to try at all or stop after just a handful of seconds
-
- Solution
- My wife came up with an ingenious idea: provide protective elbow and knee padding (age: 4+). That did the trick! It gave her enough confidence to try
- What also helped was to no longer bike in circles around our cul de sac, but to instead go around the park where there were long stretches of straight routes to go on
- Keeping up the momentum by practicing at least twice a week so she would not lose the skills she had gained the previous time
- Reminding her to keep the handlebar straight and moving just slightly when turning
- Constantly reminding her to pedal, that a faster speed will keep the bike up, and to encourage her often and enthusiastically
- Solution
1st Daughter: End of Day 2
Day 4
- This was the day he finally figured out how to start the bike on his own from full stop. I was SO PROUD of him!
- Day 5 or 6: Our 1st daughter learned how to start on her own from a full stop on Day 5 or 6 (over a span of 2 weeks due to the challenge of getting her to keep trying)
- Lesson learned: teaching her to keep the less dominant foot on the pedal, position the dominant one behind the other pedal, and “walk” (push forward) the bike with the foot until there was enough momentum for her to place it onto the remaining pedal and… pedal
Guardian Bikes made a great YouTube video on how to teach a kid to ride a bike too.
What’s Good? What’s Bad?
Here is what we liked and disliked about the Woom 2.
Pros
- Low center of gravity, increasing confidence and stability
- For children 3 – 4.5 years (37″ – 43″ height)
- Easy to get on/off the seat
- Easy transition between walking and seated
- Hand brakes designed for smaller hands: Front & Rear V-Brake
- Rear brake marked with green lever
- Freewheel kit option (to replace default coaster/foot brakes)
- 14 x 1.4″ air-filled tires for comfort
Woom 2 Peddle Bike /Woom
- Light weight at 12 lbs
- Arrives nearly fully assembled
- Convertible to Balance bike (by removing the pedals)
- Quick-release seat height adjustment
- Steering limiter to prevent overturning and falls, keeping handlebar more straight
- Gears sealed within a cartridge to minimize dust and damage
- Holds its resale value VERY well
- Very professional-looking bike with pleasing color scheme
- Woom trade-in upgrade program (upCYCLE Membership)
- 40% off towards the next size up bicycle
- Shipping cost is covered both ways
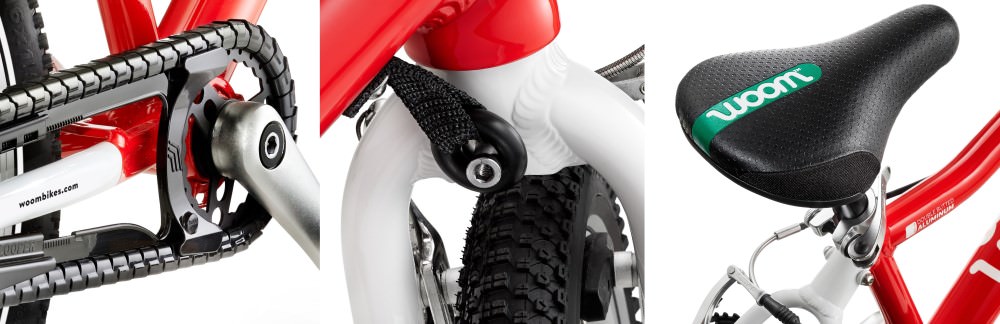
Chain, Overturn protection, Seat /Woom
Cons
- Expensive, but its resale value holds VERY well
- Kickstand not included
- No official video on how to replace the coaster brake with the freewheel
- Woom asks to have a qualified, bike technician perform the procedure
- Watch Bike Shop Girl‘s YouTube video and see if you would be comfortable doing it yourself
- Woom trade-in upgrade program (upCYCLE Membership) only applies for bikes less than 2 years since purchase
- Requires a $59 one-time, lifetime membership fee
Accessories
Some accessories I recommend for this bike for added convenience and safety:
- Salzmann 3M Spoke Reflectors: For increased visibility in the dark
Kids Bike Seats
See my Shotgun Kids MTB Seat (Review) and why I chose it over trailers, tow bars, and rear seats for quick, short rides. It has become one of my favorite additions for providing front-seat thrills to my kids. Rear rack seat cushions are also a great way for older kids to tag along, but be mindful that all racks have a weight limitation.
Shotgun Kids MTB Child Seat/Handlebar Combo
Final Thoughts
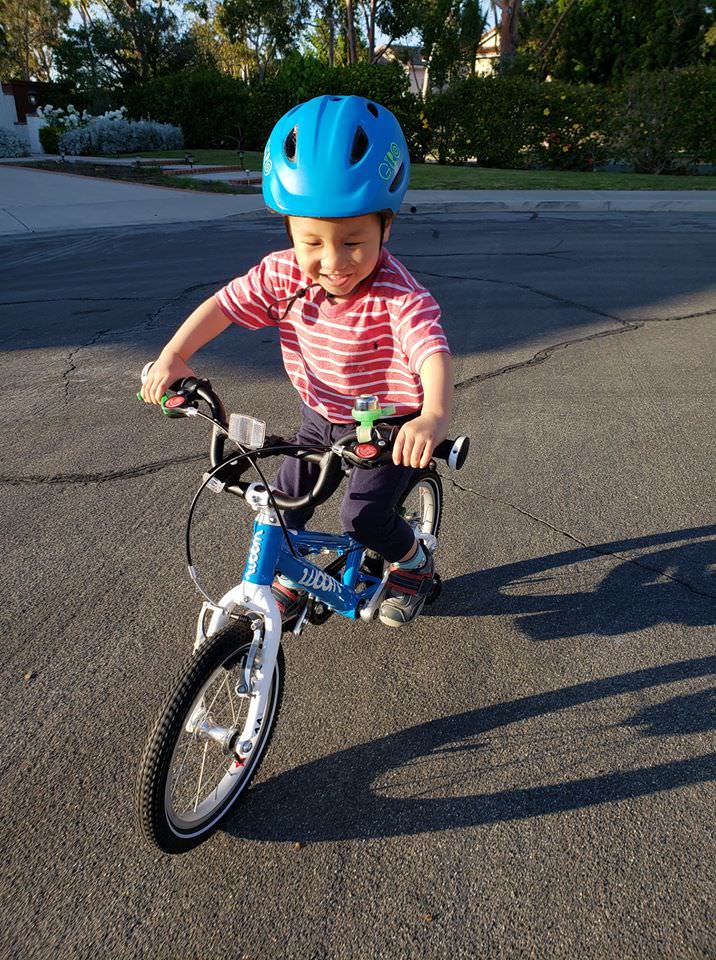
 Our son is nearly too tall for the Woom 2 now, and he had adapted well to a heavy, foot-brake bike we bought used a year ago. At this time, we are debating between purchasing the Woom 3 or a less expensive, standard bike until he was ready for the Woom 4 (which will introduce shifting gears). [Update: Went with the Woom 3 that he biked with for about 20 of 25 miles when he was 5 years old, then a Guardian 24″ for his 8th birthday.] Whichever path we choose, we have been eternally grateful to see how our little one went from a scared boy on a balance bike to a confident, fast-riding, joyful bicyclist. The memories we had created along the way had been countless, and we look forward to introducing our daughters to biking soon too.
If there was one takeaway about teaching a child how to bike, I would point out the importance of being patient, encouraging, and making him or her feel safe at all times.
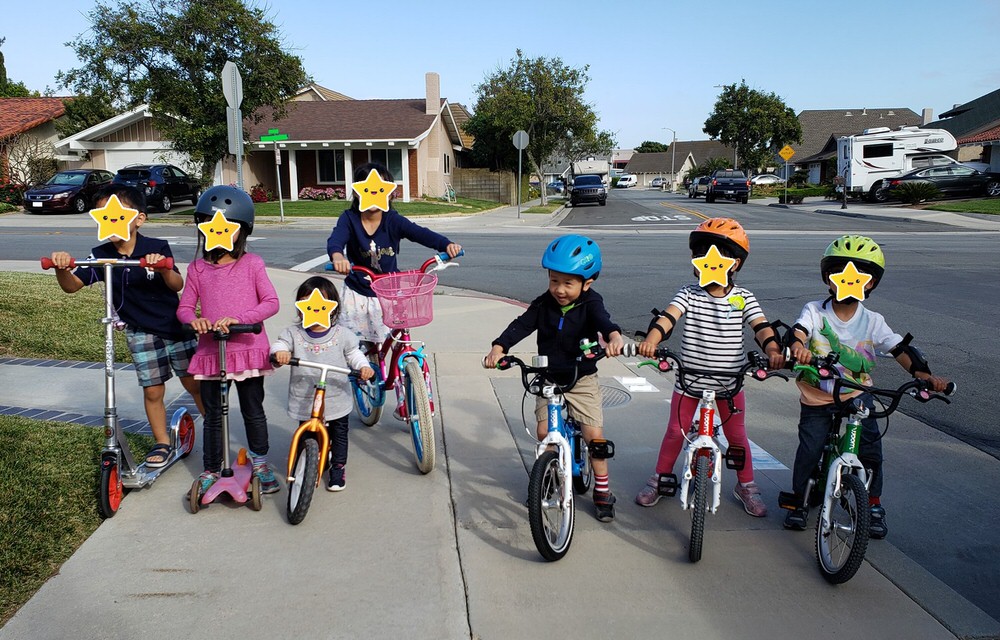
Our children on bikes and scooters (2019)
Peer pressure may also help: we once had a get-together with friends and let all of our children bike around the park. One of the girls, her father said, refused to learn how to bike and would rather go on a scooter. With his permission, I took her on my son’s Woom 2 and helped her balance by holding on to the bottom of the seat. She kept falling off, but both of us were determined to help her figure it out while her friends were merrily zipping around. Alas, that time did not come that day, but the next afternoon, her father texted to share what she said that morning: “Daddy, I want to bike.” Words a dad loves to hear!
With our 1st daughter, getting her protective pads and riding at the park were key to giving her enough confidence and fun to want to bike often. She, too, said: “I love biking“.
Where To Buy
- Woom Bike Series (Official site)
- Accessories
- Bell Kids Protective Pad and Glove Sets (Age 4+)
- Kickstand for Woom 2 & 3
- Salzmann 3M Spoke Reflectors
- Balance Bikes
- Chillafish BMXie-RS / Strider 12 Sport / Joycruise 3-in-1 Tricylce (Tricycle/Balance Bike)
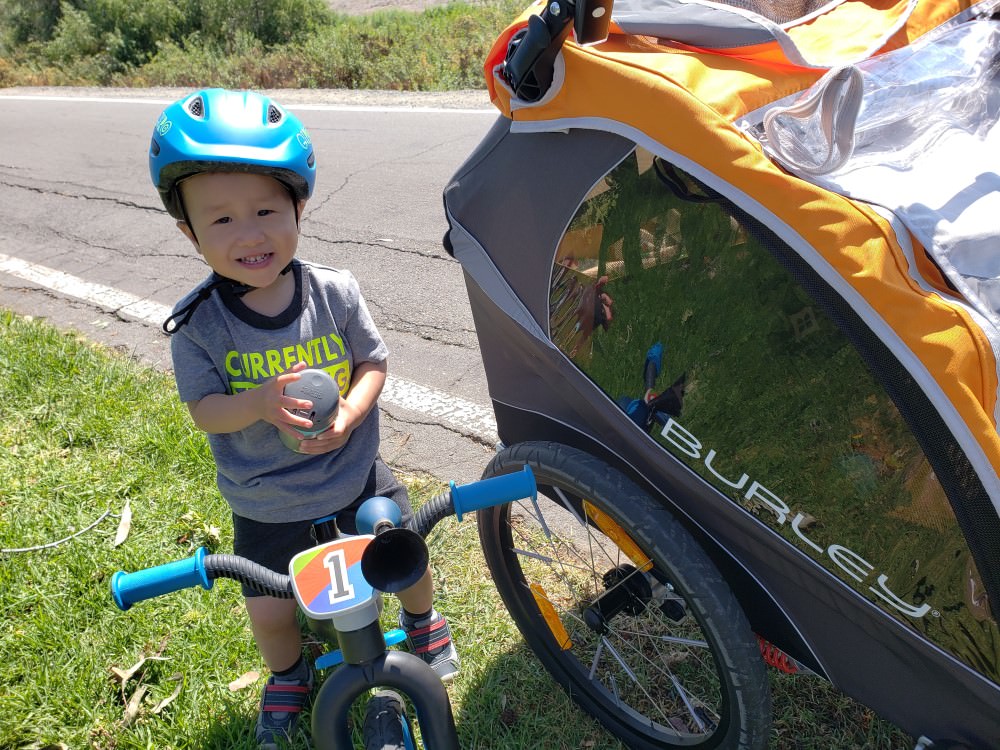
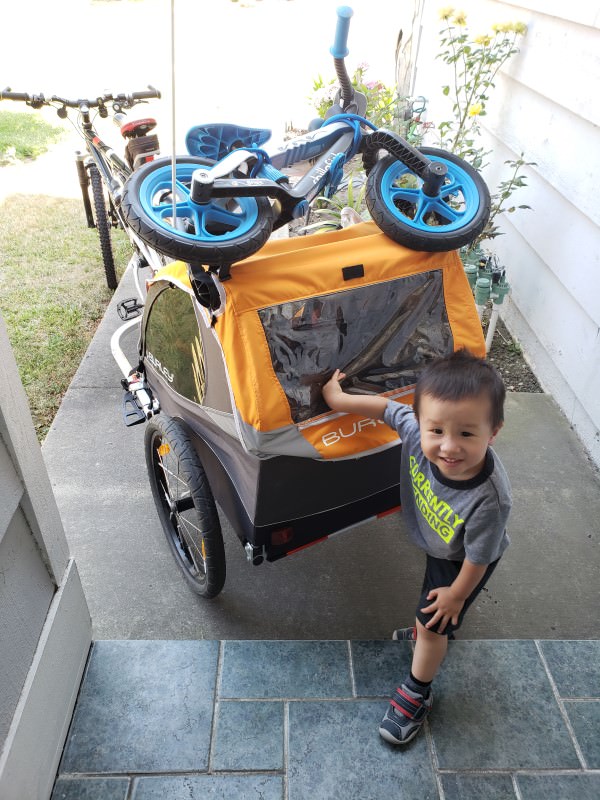
- Burley D’Lite 2-Seat Bike Trailer/Stroller
- Additional Trailer Coupler so Burley can be switched to another bike (ie. bike failed or ran out of battery)
- Crocs Clog shoes
- Bike USA Stabilizer Wheels for Adults
- Guardian Kids Bikes
Related Posts
- Bike USA Stabilizer Wheels for Adult Bicycles
- Reviews
- HeyBike Cityrun: Beautiful, 26″ electric cruiser bike with 500W motor, 7 speeds (21mph)
- Polarna M4: 20″ foldable, electric bike with 750W motor, 8 speeds (30mph+), and 4″ fat tires
- Jasion EB7: 20″ foldable electric bike with 3″ fat tires, 7 speeds, and can accommodate 5’1″ – 6’2″ tall riders
- Googo SY26: 26″ electric mountain bike with 21 speeds, large informative LCD, electronic headlight and horn, and solid build
- Metakoo Cybertrack 100: 26″ electric mountain bike with 21 speeds and a clean look
- Ancheer AM001907/AN-EB001: 26″ electric mountain bike with 21 speeds, electronic headlight and horn, and powerful, rapid acceleration
- Macwheel Ranger 500: Comfortable, 7-speed, electric cruiser for city commutes
- Gyroor C3: Single speed, electric, semi-foldable, and priced fairly low