

Contents
FortiManager
Fortinet provides a great tool for “centralized management, best practices compliance, and workflow automation”: FortiManager. The ability to perform administrative functions from a single pane of glass across a wide variety of Fortinet products, including FortiGates, presents a need to have it, itself, secured from breaches. Besides implementing Trusted Hosts and other security measures, an administrator should ensure that the product uses a trusted certificate.
FortiManager uses a self-signed, untrusted “Fortinet_Local” certificate by default. Here is how to request and implement a CA-signed (Certificate Authority) certificate so the “Your connection isn’t private”/”This site is not secure” error thrown by your browser goes away.
This post assumes you already know how certificates work.
Obtain a CA-Signed Certificate
Generate a CSR
First, generate a Certificate Signing Request (CSR) to be sent to the CA for signing.
- From FortiManager, navigate to System Settings > Certificates > Local Certificates
- Notice that “Fortinet_Local” already exists
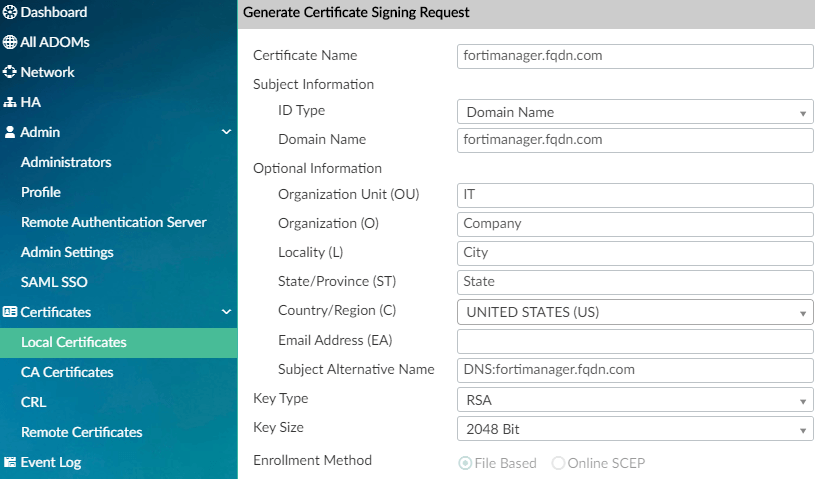
- Click on Create New and fill out the CSR form:

- Give it a friendly Certificate Name to help you identity the cert
- Subject Information field corresponds to Common Name/CN and is optional
- From a security perspective, you should use ID Type: Domain Name and never Host IP
- Subject Alternative Name (SAN) is mandatory. Prefix the fully-qualified domain name (FQDN) with “DNS:“, such as “DNS:fortimanager.fqdn.com”
- Note the “DNS:” prefix. This is VERY important, or the SAN won’t be added
- When the CSR has been created, you will see the cert in “PENDING” status:

Have the CSR Signed
- Select the “PENDING” certificate and click on Download
- Send the CSR to the Certificate Authority administrator for signing
- If FortiManager is used internally, there is no need to obtain a cert from a public CA, such as GoDaddy, DigiCert, Comodo, etc.
- Include in your request to have the certificate returned to you in PEM/Base64-encoded format
Complete the CSR
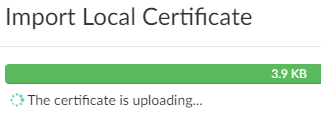
- When the CA administrator returns the signed certificate to you, import it into FortiManager (System Settings > Certificates > Local Certificates > Import)
- Right after import, FortiManager may abruptly kick you out of the browser session. Refresh the browser and log back in
- Right after import, FortiManager may abruptly kick you out of the browser session. Refresh the browser and log back in
- The “PENDING” certificate should now contain the Subject information you had entered into the CSR form. Status should show “OK”
- Selecting the Certificate and clicking “View Certificate Details” should show the CA as the “Issuer”, and under “Extension”, you should find the Subject Alternative Name (SAN) with Content of DNS:fqdn.com
- Optionally, you may upload the CA’s Public and Subordinate CA certs to Certificates > CA Certificates


Configure FortiManager to Use the CA-Signed Cert
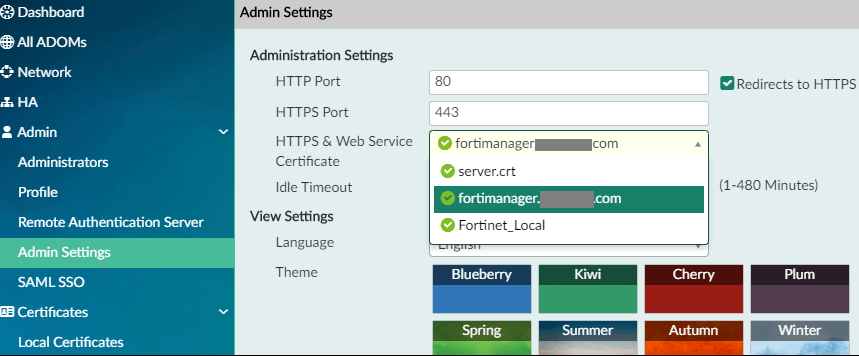
- Navigate to System Settings > Admin > Admin Settings > HTTPS & Web Certificate
- From the dropdown list, select the CA-signed certificate you generated earlier
- A reboot is not required
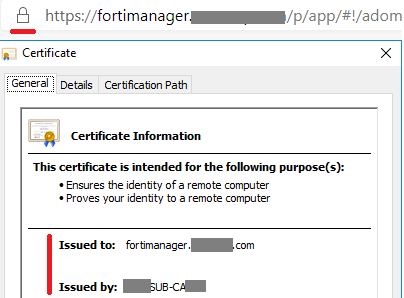
- Verify that FortiManager is using the new cert by opening a new browser window/session
- The certificate should show the cert’s FQDN and the CA it was issued by
- The certificate should show the cert’s FQDN and the CA it was issued by
Your FortiManager instance is now secured with a CA-signed certificate, and your web browser should no longer give you a warning that the site/certificate is untrusted.
References
- Local Certificates: FortiManager 6.2.3 Admin Guide
- SAN in CSR: Fortinet KB FD35090
Related Posts
- OpenSSL Command Reference: Convert, Check, Verify, Extract
- Certificate Security: Export Cert with Non-Exportable Private Key / Marked as “Not Exportable” (Windows PKI)
- Google Chrome: Revoked Web Certificates