
Contents
StoreFront 3 Unified Receiver Experience
Citrix StoreFront 3 attempts to unify the Citrix user experience by providing the same look and feel across all devices. As of this writing, this is the case for the Web and the desktop versions of Receiver for Mac and Windows. The intended experience is for an end user logging on to the StoreFront website to be the same with the Receiver for Windows app. The unified look will come to Android and iOS Receiver versions later, according to Citrix.
Receiver for Windows: Unified Experience
The new interface is much more modern, clean, and gets rid of the ugly, green bubbles they had used in the past. Thank goodness! (I previously wrote a post on how to change that green interface for StoreFront 2.)
Customization Folders
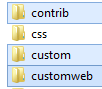
StoreFront 3: customization folders
In StoreFront 2, customizations were done in the C:\inetpub\wwwroot\Citrix\StorenameWeb\contrib folder. With version 3, they are done in C:\inetpub\wwwroot\Citrix\StorenameWeb\custom (where Receiver for Web’s customization resides.) You can find a “contrib”, “custom”, and “customweb” folder in the new release.
The “custom” folder still contains customizations for the Classic Receiver Experience, and as such, when you switch between the Unified and Classic experiences, both of their customizations remain intact.
Despite the improved end-user experience, there are some bugs I have come across when trying to customize the Unified look.
Customize Unified Receiver Appearance
This post assumes you are familiar with Style Sheets and StoreFront 2 customization, and was written for StoreFront 3.0.1.56.
Issue 1: Logo Sizing
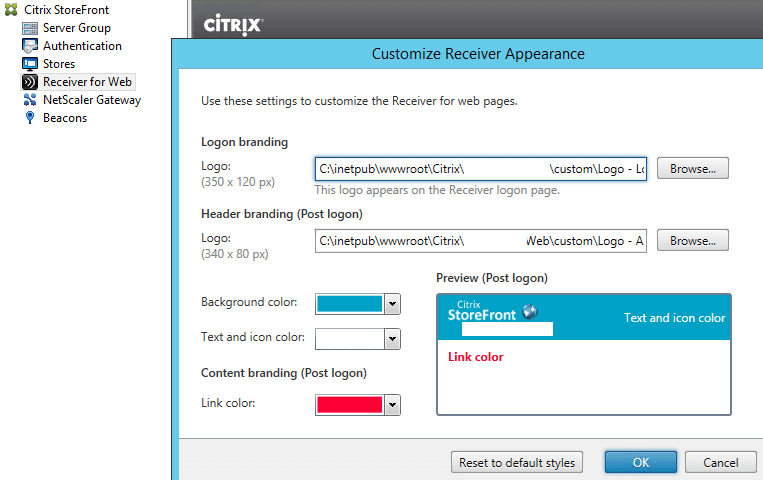
Despite the Customize Receiver Appearance dialog for “Receiver for Web” specifying that the logos should be 350×120 or 340×80 pixels, depending on Logon or Header branding, providing images with those images end up displaying in HALF their sizes. Why would Citrix display a 264×81 pixel logo at 132×40 pixels, one half the intended size?
Citrix creates “Citrix_HalfHeaderLogo.png” and “Citrix_HalfLogonLogo.png” alongside the images you provide, and when looking at the \custom\style.css file, you will find the below code (emphasis added):
.is-hdpi .logo-container{
background-image: url('Logo - Apps.png');
background-size: 60px 20px;
}
.logo-container{
background-image: url('Citrix_HalfHeaderLogo.png');
background-size: 60px 20px;
}
.is-hdpi .logon-logo-container{
background-image: url('Logo - Logon.png');
background-size: 132px 40px;
}
.logon-logo-container{
background-image: url('Citrix_HalfLogonLogo.png');
background-size: 132px 40px;
}
In the above example, “Logo – Apps.png” is 119×40 pixels, and “Logo – Logon.png” is 264×81 pixels. Citrix halved both image sizes, and so the logos do not display as intended. I assume that Citrix’s intent is for only the “Half*Logo.png” images to be halved, not the full-size versions.
I work around this issue by manually editing the style.css sheet as follows. The code is placed after the “You may add custom styles below this line” line:
/* CITRIX DISCLAIMER: END OF MANAGED SECTION. */
/* You may add custom styles below this line. */
.is-hdpi .logon-logo-container{
background-image: url('Logo - Logon.png');
background-size: 265px 81px;
}
.logon-logo-container{
background-image: url('Logo - Logon.png');
background-size: 265px 81px;
}
.is-hdpi .logo-container{
background-image: url('Logo - Apps.png');
background-size: 119px 40px;
}
.logo-container{
background-image: url('Logo - Apps.png');
background-size: 119px 40px;
}
The above code references the logos at their actual dimensions, and now both the Logon and Apps screens display correctly, as well as Receiver for Windows.
Issue 2: MMC Crash on Customize Receiver Appearance
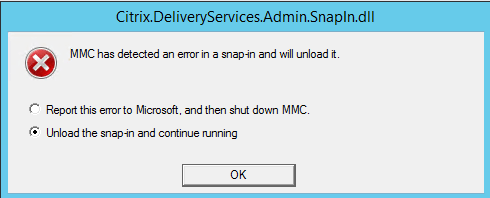
I noticed the StoreFront throwing a series of error messages when trying to “Customize Receiver Appearance”:
Error 1: Citrix.DeliveryServices.Admin.SnapIn.dll: “MMC has detected an error in a snap-in and will unload it.”
Error Message 1
Error 2: Unhandled Exception in Managed Code Snap-In: “FX … Token is not valid. System.FormatException”
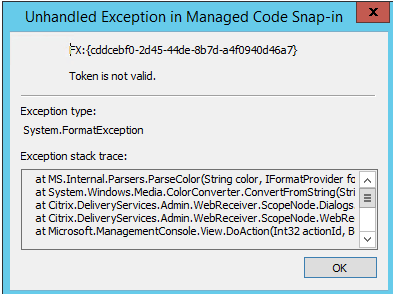
Error Message 2
Error 3: Snap-in Unavailable
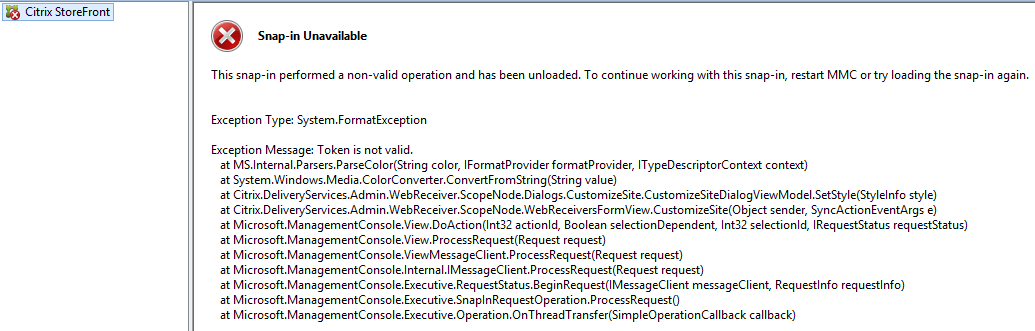
Error Message 3
I immediately knew that this was likely caused by some code in the custom\style.css. Upon further digging, it turns out that you cannot place any of the following code blocks below the “You may add custom styles below this line” line:
.theme-header-bgcolor {
background-color:#00A1C7;
}
.theme-header-color {
color:#FFFFFF;
}
.theme-highlight-color {
color:#FF0035;
}
I placed a copy of the code below “You may add custom styles below this line” in order to ensure consistency by overriding any other color scheme an admin may choose to select in the “Customize Receiver Appearance” screen.
In other words, the above code can only be between the below code block:
/* The following section of the file is reserved for use by StoreFront. */
/* CITRIX DISCLAIMER: START OF MANAGED SECTION.
PLEASE DO NOT EDIT ANY STYLE IN THIS SECTION */

Your code here

/* CITRIX DISCLAIMER: END OF MANAGED SECTION. */
/* You may add custom styles below this line. */
Tip
At any time when you are customizing your Receiver for Web, you can add one of the below to the address (URL) to get the desired result:
?-ph
Display StoreFront in a mobile format (example: https://storefront/storeWeb/?-ph)?-nocustom
Display StoreFront without any customization (example: https://storefront/storeWeb/?-nocustom)
Final Thoughts
Citrix has gone into the right direction with StoreFront 3 by allowing customizations to be done through the graphical user interface again without having to modify code. However, with the two bugs I discovered during the 2 hours of customizing last night, it is apparent that it still is a work in progress. Nonetheless, I do like the new look, though I wished you could add additional information, such as:
- Which StoreFront server one is connected to
- Information to display to the users on the Apps screen, such as who to contact when IT support is requested
My Customizations
Here is my first attempt at customizing StoreFront 3’s Unified Experience. The top half is the default.
Color scheme used:
/* The following section of the file is reserved for use by StoreFront. */
/* CITRIX DISCLAIMER: START OF MANAGED SECTION.
PLEASE DO NOT EDIT ANY STYLE IN THIS SECTION */
.theme-header-bgcolor {
background-color:#009BC2;
}
.theme-header-color {
color:#FFFFFF;
}
.theme-highlight-color {
color:#008DFF;
}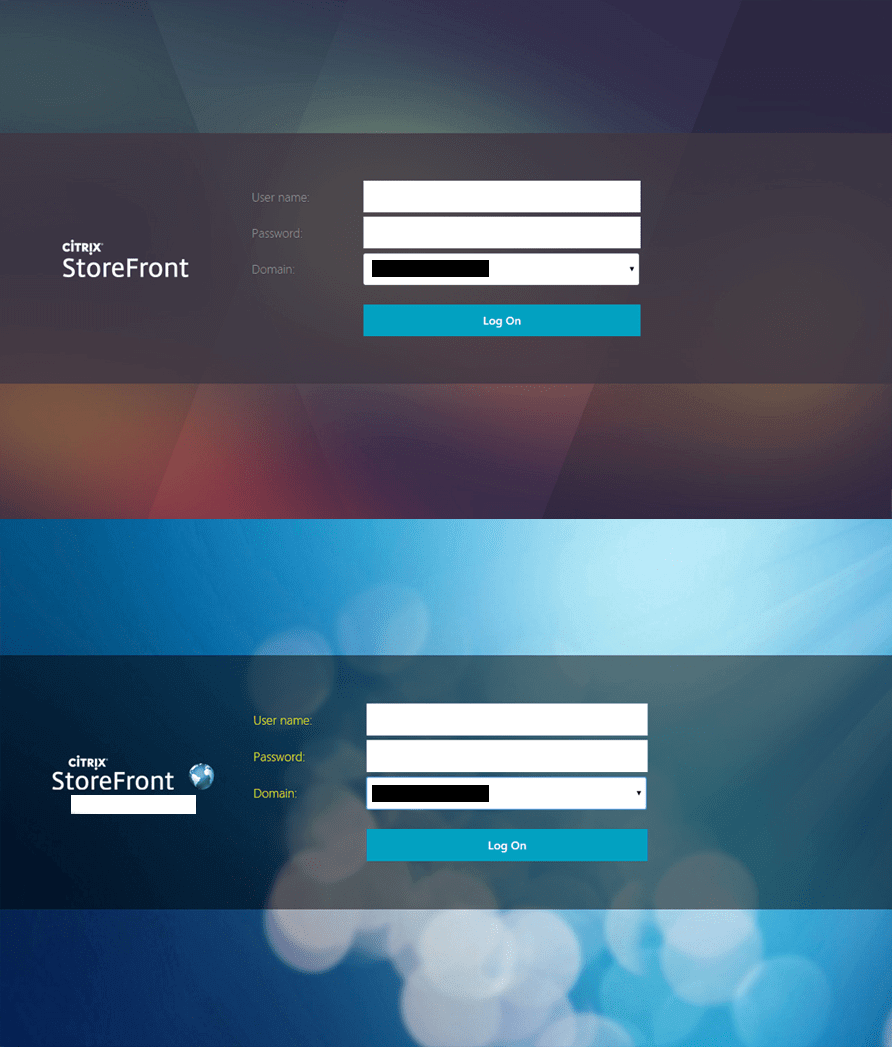
Citrix StoreFront 3: Logon
Code to achieve the above logon screen look:
/* CITRIX DISCLAIMER: END OF MANAGED SECTION. */
/* You may add custom styles below this line. */
.is-hdpi .logon-logo-container{
background-image: url('Logo - Logon.png');
background-size: 265px 81px;
}
.logon-logo-container{
background-image: url('Logo - Logon.png');
background-size: 265px 81px;
}
.web-screen {
background-image: url(./bg-logon-citrix.jpg);
background-size: cover;
/* background-size: contain; */
}
.web-screen .content-area {
color: #FFFFFF;
background-color: rgba(0,0,0,.5);
}
.credentialform .error, .credentialform .warning,
.credentialform .information, .credentialform .inprogress,
.credentialform .confirmation, .credentialform .plain {
color: #EEEE00;
}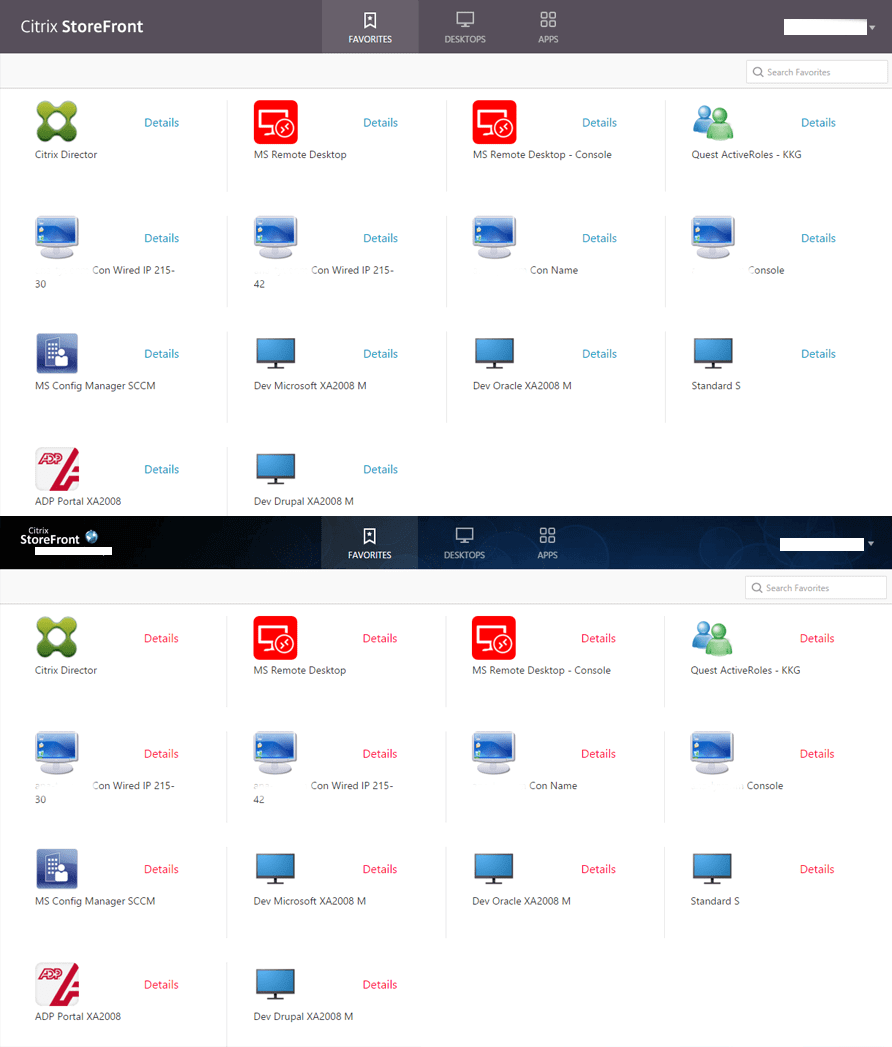
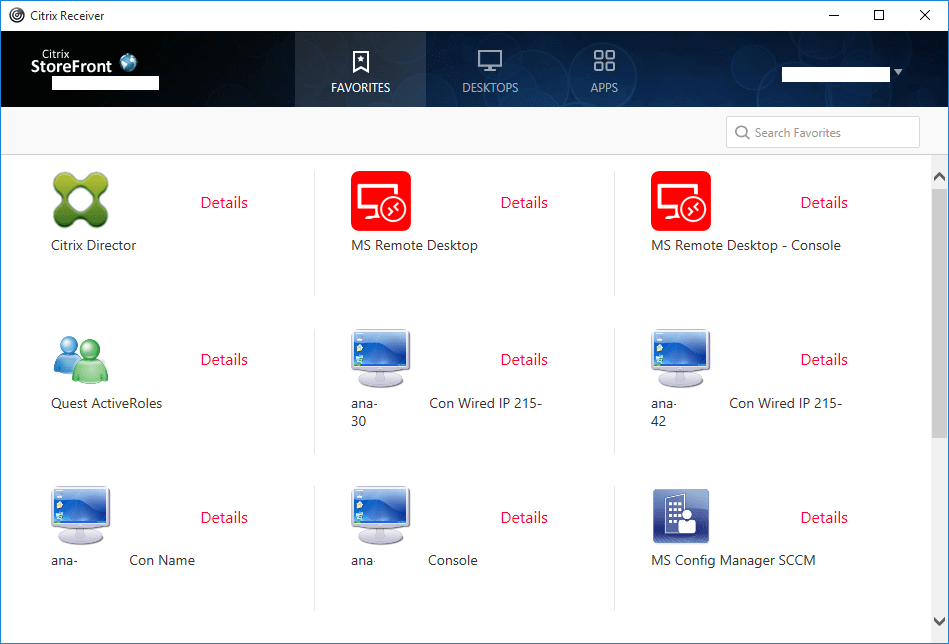
StoreFront 3: Home – Favorites
Code to achieve the above Apps screen look:
/* CITRIX DISCLAIMER: END OF MANAGED SECTION. */
/* You may add custom styles below this line. */
.theme-header-bgcolor{
background-image: url(./bg-apps.jpg);
background-size: cover;
/* background-size: contain; */
}
.is-hdpi .logo-container{
background-image: url('Logo - Apps.png');
background-size: 119px 40px;
}
.logo-container{
background-image: url('Logo - Apps.png');
background-size: 119px 40px;
}
Interested in StoreFront 2 customization? Click here.