
Contents
Introduction
My best friend and I wanted to do a 4-day backpacking trip through Yosemite via Tuolumne Meadows. We would like to have at least one a year whenever our busy lives would permit. California has been in a severe drought, and we went into the trip in early July with the expectation that it would be dry throughout the route, hot during the day, cold during the night, and annoying with mosquitoes everywhere.
The first two days were living mosquito HELL — we had never seen so many swarm around us before and had to constantly re-apply repellents! Not until we reached Evelyn Lake did we finally receive temporary relief — a brief moment we greatly ENJOYED before we were forced to retreat into our tent by a country of thirsty mosquitoes. It was very hot inside, even without a rain cover, but it was like heaven.
As evening approached, potential for rainfall neared, and temperatures started dropping, we gleefully observed the moon rising above the horizon, washing out the stars in the sky.
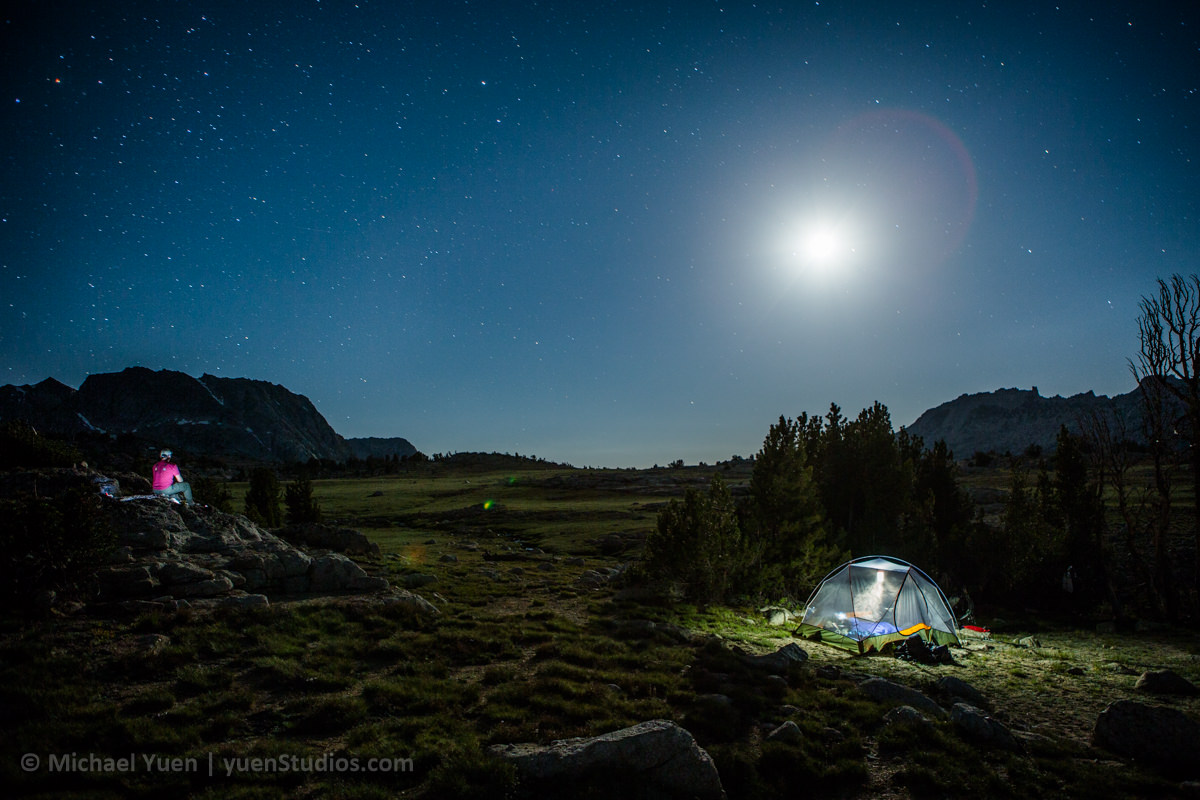
Moonlit Yosemite, July 2014
Inspired by an REI photo, I had always wanted to take a picture of a lit tent in a scenic surrounding. I decided to take my first, serious attempt at capturing such an image. Here is how the featured image was shot and processed.
Goals
- My primary goal was to capture a lit tent with the half moon in the sky. As such, I did not want too much noise and kept the ISO as low as possible
- Secondary goal was HOPING for as many stars to show up as possible, knowing that most would be drowned out by the half moon. Time: 11 pm.
- The thought of including myself (person in red shirt) admiring the moon came a bit later.
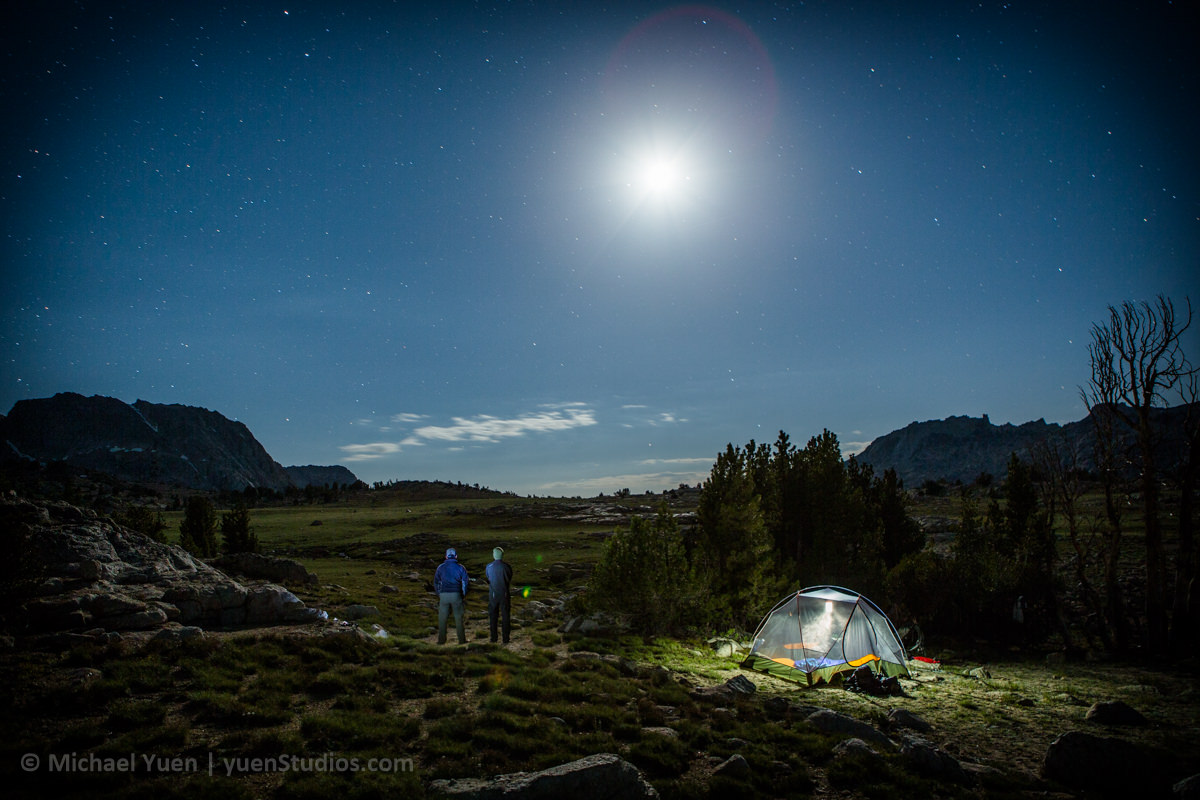
Admiring the moon
Camera and Gear
- Canon 5D Mark III, 24-70mm f/2.8L at 24mm, 30 sec @ f/3.2 ISO 400
- No flash was available, but an iPod, and two headlamps (one was weak) were usable for improvised lighting
- An inexpensive, flimsy tripod was at hand
- A wireless shutter remote was available, but not used
Challenges
- Racing through dark, rocky terrain in sandals to get to the spot I wanted to sit or stand on within 6-8 seconds and without injuring myself along the way
- After reaching the spot, getting the heart beat to slow down enough to sit still for 30 seconds and hope for a sharp capture of myself (didn’t succeed). Any slight movement would result in blurriness
- Getting a satisfactory shot before the moon either rose too high or disappeared to camera right
- Getting headlamps & iPod light brightness, distance, and focus just right to light up my whole body without overexpose
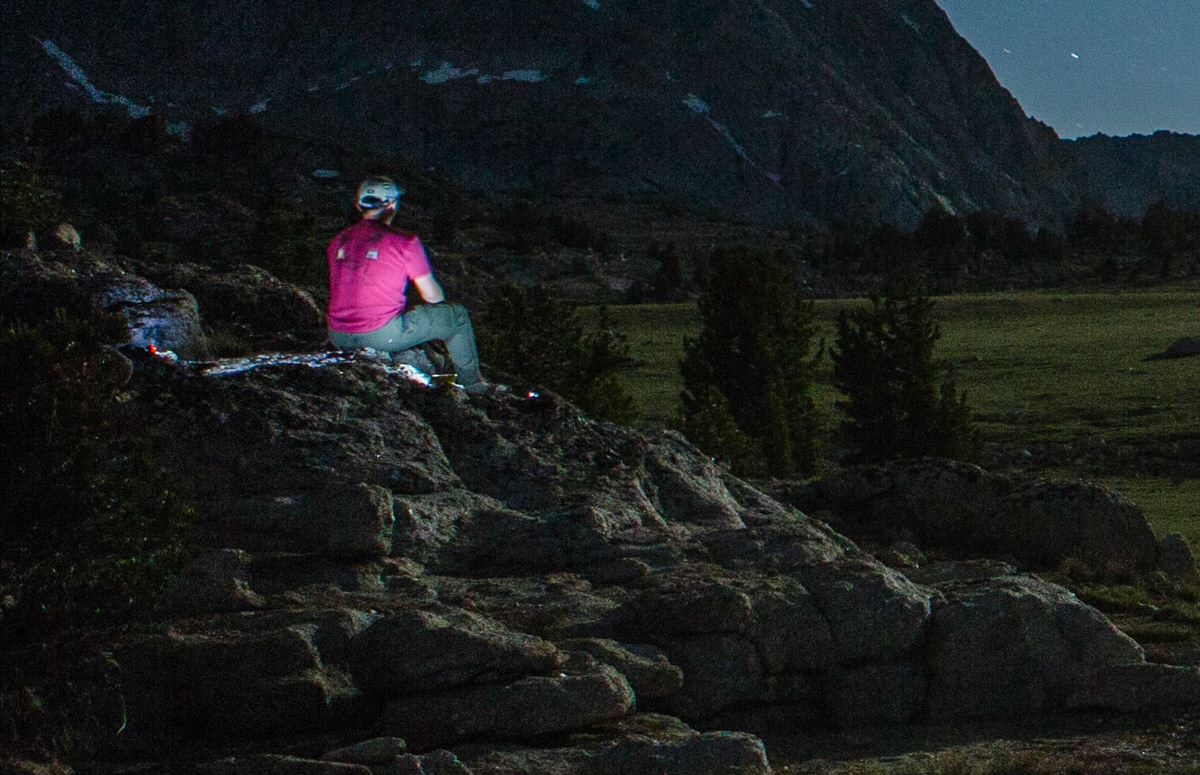
How I lit myself on this rocky area
Setup
Lighting
- Half moon in the sky
- Solar light hung from tent ceiling (and asking my best friend to not move!)
- Improvised lighting through placement of headlamp at my 6 o’clock position, iPod at 4, and a weaker headlamp at 2 to light me up
Shot Process
- The camera was placed on a fully-extended tripod on a raised part of the site
- The on-camera timer was set to a 10-second delay. I had a wireless shutter trigger packed with me, but I was too lazy and stubborn to take it out. It was very late, we were tired, and I had only expected to take no more than 5-10 shots
- As soon as I hit the timer, I ran up the rocks — in sandals — as quickly as I could while making sure not to twist my ankles in the darkness. It took about 6-8 seconds to get there, and another 2-4 seconds to sit down and hold still for the 30-second exposure.
- Over 25 shots were taken, and none completely satisfied me because (1) I was too blurry from movement, (2) looking too fat or awkward in my pose, or (3) didn’t approve of the overall composition.
- I finally gave up and decided that the one featured in this post was good enough, especially after I twisted my ankle slightly a couple times. On a number of occasions, I also lost my sandals on the way up the rock.
Editing
The first thing I wanted to do was lighten up the overall scene, lower the moon’s exposure, and finally reveal as many stars as possible. I also did not enjoy how warm the original image was.
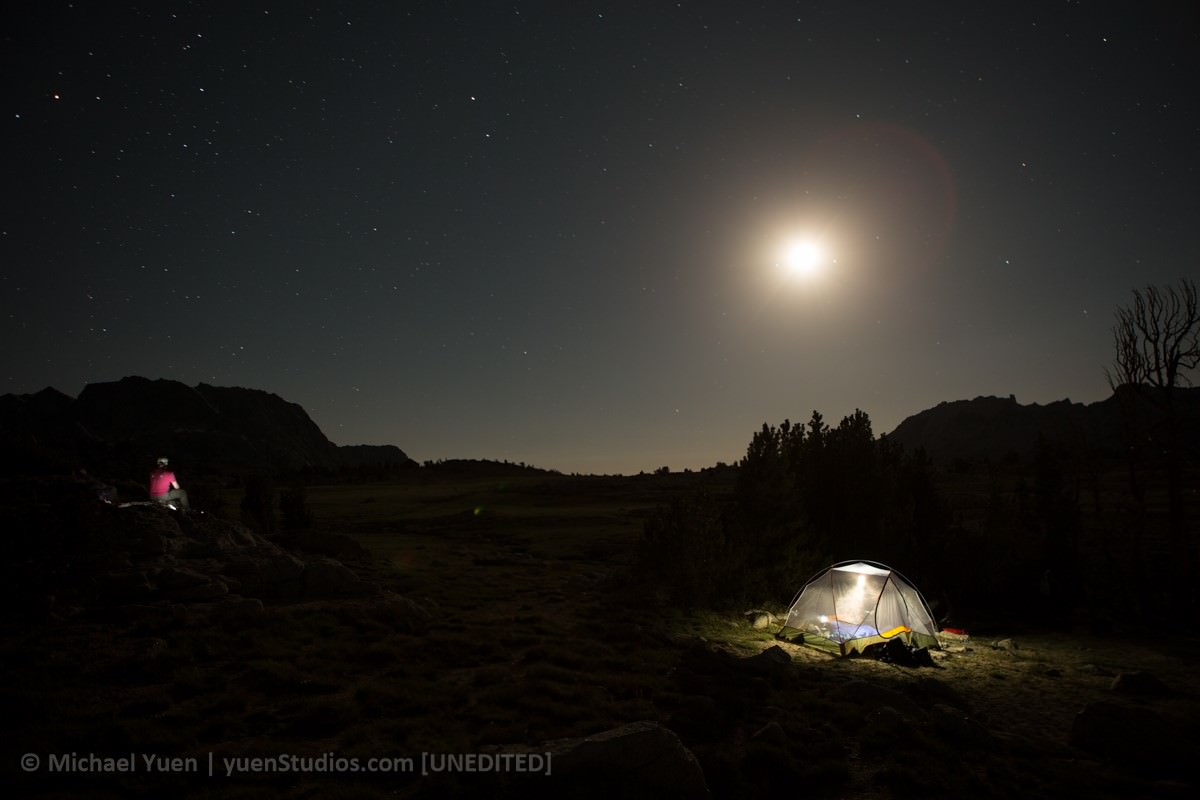
Unedited Shot
Overall Adjustments
- Exposure +0.95, Contrast +38, Highlights -74, Shadows +95, Blacks +26, Clarity +19
- Tone curve: Highlights +20, Lights +9, Darks +34, Shadows -40
- WB from 6000 to 4024, -2 Vignetting, Crop Angle
Spot Adjustments
- Darkened the sky, increased contrast, and adjusted highlights in order to bring out the stars and lower the moon’s brightness
- Restored some detail by adjusting highlights of my red shirt
Lessons Learned
- Stop being stubborn and take out the wireless shutter remote, although I didn’t mind the exercise. The remote would have allowed me to rest my heart rate enough to be able to sit more still. It would have also helped minimize the potential for injuries when running through rocky terrain in darkness.
- As landscape photographer, Matthew Saville, pointed out on his welcomed advice on how to capture more stars:
[The] only thing you could do is go on a day when the moon has waned a little more. A teeny tiny crescent moon is all you really want if you’re trying to maximize stars and yet still illuminate a landscape.
For reference, with ZERO moon, a proper exposure for the stars often involves ISO 3200, 30 sec, and f/1.4-f/2.8. [So] the fact that you’re at ISO 400 and f/3.2 means you’re more than three or four stops under-exposed as far as seeing lots of stars would go.
Thoughts
Despite having been eaten alive by mosquitoes and having our spirit broken (we cut our 4-day trip down to three — we HAD to get out of there), we were in absolute awe of the beautiful route we took. We were also dismayed by the California drought — many streams were bone dry, making the trek through the high elevation a battle of will power.
The photo has also become one of my favorites, and I am very pleased with my first, serious attempt at landscape night photography during a backpacking trip. The beauty of the site we camped at still rings vivid in my memories.
Final, Edited Version – Moonlit Yosemite, July 2014